Intro to Leadership
In-game, leadership is what allows a 46-player platoon (plus attachments) or a 130+ player company to act as one cohesive and combat-effective unit. From the fireteam leader up to the platoon or company commander, the success of every mission hinges upon their collective abilities as leaders. While leadership on the 'wild blue internet' can be an intimidating and oft frustrating thing, we have the good fortune in our group to have a well-established cadre of leaders who are capable of performing at any capacity needed, as well as an excellent collection of players available to carry out the orders of their leaders with skill and enthusiasm.
This section is intended to act as a refresher and reference to those who do lead, as well as introduce the concepts of all levels of leadership to those who are interested in pursuing and advancing to such leadership positions in the future, or refining their current abilities. Countless hours of discussion, debate, and optimization of our leadership methods, as well as a generous amount of research into the US Marine, US Navy and US Army leadership methods and discussion between our current and prior-service military members has resulted in this section.
I hope that anyone with leadership aspirations finds this piece to be helpful in their quest for leadership roles and responsibilities.
Common Responsibilities of a Leader
At the most basic level, leadership is the art of getting multiple people to act in a coordinated fashion towards a common goal. Leaders come with a variety of roles and responsibilities, with each requiring different approaches to how they do things. From the fireteam leader up to the platoon commander, though, they all share some common responsibilities. Those responsibilities are as follows.
1. Survival.
Whenever possible, the leading players should make an effort to preserve themselves. This becomes more important the higher in the chain you are - if you're a Fireteam Leader, you're most expendable, with the Platoon Commander or Company Commander being the least expendable. "Survival" is accomplished by acting in a fashion that will not put you at extraordinary risk or single you out to the enemy. This means that a leader should not be using anti-tank weapons, machineguns, or anything that will place a giant "SHOOT ME" marker over their head for the enemy. Your best weapons are the players you command, and they depend on your levelheadedness to keep them alive throughout a fight. Don't fail them by putting yourself recklessly on the line and being taken out by the enemy.
2. Know the job of the leader above and below you and be prepared to assume the role of your immediate superior if he becomes a casualty.
Know the role of the leader below you so that you can most effectively command him and his troops. Know the role of the leader above you so that you are able to take his place if he becomes casualty.
3. Be clear and concise when giving orders.
Being able to give an easy-to-understand order during the heat of virtual combat and getting your teammates to work towards accomplishing it can turn the tide of a battle. Brevity is critical to understanding - everyone in a firefight is going to have to worry about many things at once, and having to concentrate on a long and wordy order from their element leader will cause nothing but trouble.
4. Decide quickly and act.
You do not always have time to figure out the perfect way to approach things. Being able to decide on a good plan and get it put into play as rapidly as possible is more valuable than spending a large amount of time thinking of the perfect plan and trying to implement it. "A good plan now is better than a perfect plan later". This is especially true when combat is ongoing and every second of delay puts you further behind the curve.
5. Task by name, especially when bullets are flying.
Saying that "Someone needs to grab that AT" is not a decisive order, and since nobody is singled out specifically, it may be forgotten or ignored in the confusion of battle. It is much better to single out people in your element to do specific tasks - i.e. "Boyer, get the AT off of Lloyd's corpse" or "Rugama, get on the .50cal for Gloria's MRAP". Call people by name and task them directly and you'll see that things will get done much faster with less ambiguity and confusion.
6. Avoid micro-management.
Leaders need to let leaders lead - it sounds blindingly obvious, but it has to be said. Orders should be given that allow a subordinate to get them done in the way that they deem to be best. Lower-level leaders require tactical flexibility to get their jobs done - dictating exactly how an element should move and rigidly enforcing it can get people killed. It is better to give guidelines - that you need them to move to a certain place, and that they should try to follow waypoints you set for them - and allow them to adapt to it as they see fit. Obviously there are exceptions to this, but they are just that - exceptions, not the rule. Micro-management stifles tactical flexibility and lower-level leadership and should be avoided.

7. Exercise tactical patience.
Tactical patience is defined as "giving a situation enough time to develop and unfold before trying to determine its meaning, significance and how to react to it". There will be times where the leaders will have to sit back and allow the situation to unfold, without trying to jump in and start giving orders before it is prudent. As an example, just because you see a few infantrymen approaching from one flank does not mean that the bulk of the attack will be coming there, so it would be unwise to shift your defenses before the situation developed further and you could come to a more informed decision.
8. Exercise disciplined initiative.
Remember the earlier section talking about the importance of individual initiative at all levels? Leaders are no exception - one of the core aspects of our group's leadership mentality is the ability to exercise initiative in a disciplined manner that aligns itself with the higher commander's intent. Leaders are expected to be able to make good decisions on their own when the situation requires it, without having to consult with the higher commander for permission. It is a sign of our trust in our junior leaders and it gives them the freedom to adapt to a rapidly changing situation.
Pen & Paper
One helpful aid for all players, and particularly leaders, is the usage of a pen and paper for note taking. It is highly recommended that all players have note taking gear available while playing in a session.
While features like dynamic unit rosters can provide easy-access to the names of any elements in a mission, or any players in a specific team, having a pen and paper allows you to take additional notes when the situation requires it. The notepad can be used to write anything special that may need to be referred to later in the mission, specific rules of engagements, formations, timings for various events, etc. This varies from mission to mission.
Notepads are also great for writing down anything significant that happened in a mission, such as things that could form the basis for 'lessons learned', or those that deserve particular praise in the after-action review of the events.
Preparing for the Mission
All in-game leadership is ultimately focused at working towards mission accomplishment. Regardless of what the particular mission may be, there are certain common steps taken to go from the slot-selection screen of Arma, all the way into the actual mission itself, with the end goal being a solid plan that has been briefed to all players and leaders.
This section will cover everything involved in the process, from picking slots to planning and ultimately executing the plan. All players should be familiar with the steps involved, and leaders (or aspiring leaders) should pay extra attention to all that is involved.
This section will cover everything involved in the process, from picking slots to planning and ultimately executing the plan. All players should be familiar with the steps involved, and leaders (or aspiring leaders) should pay extra attention to all that is involved.
The Briefing
After picking your role, the next pre-mission step is the briefing stage. During this, all players will have access to the in-game map, the briefing, notes, gear loadouts, and will be able to place map markers and text to assist in mission planning.
The mission briefing is designed to give all of the information needed to create a proper plan that can be carried out by the platoon. It is the responsibility of all squad leaders, fireteam leaders, special element leaders, and the mission commander to be familiar with the details of the briefing. Knowing the briefing benefits everyone, as it allows for everyone to be familiar with the 'big picture' of what they are expected to be accomplishing within the mission and helps to unify the entire unit. All players are highly encouraged to read it as well.
The mission briefing is designed to give all of the information needed to create a proper plan that can be carried out by the platoon. It is the responsibility of all squad leaders, fireteam leaders, special element leaders, and the mission commander to be familiar with the details of the briefing. Knowing the briefing benefits everyone, as it allows for everyone to be familiar with the 'big picture' of what they are expected to be accomplishing within the mission and helps to unify the entire unit. All players are highly encouraged to read it as well.
SMEAC - The 5 Paragraph Operations Order
Mission briefings generally follow the "Five paragraph order" format - also known as "SMEAC" - condensed to fit in the framework of Arma. In this, information is presented in a standardized fashion, allowing for any player to easily find out what he needs to know about the mission with minimum fuss.
SMEAC breaks down as follows. Bear in mind that it is up to the mission designer to decide what elements are important to be presented in the briefing - the "Keep it simple" rule is employed when writing the actual briefing, while this information is used to help guide that process.
SMEAC breaks down as follows. Bear in mind that it is up to the mission designer to decide what elements are important to be presented in the briefing - the "Keep it simple" rule is employed when writing the actual briefing, while this information is used to help guide that process.
SITUATION
• What is the premise of the mission? Why is your unit where it is, and what's happening around it? What is the "big picture"?
• What kind of forces does your unit have?
• What kind of forces (if any) are supporting you or attached to your unit? This includes close air support, artillery, armor, or any other combined-arms assets.
• What kind of forces and support does the enemy have?
• What is the enemy expected to do?
• What kind of forces does your unit have?
• What kind of forces (if any) are supporting you or attached to your unit? This includes close air support, artillery, armor, or any other combined-arms assets.
• What kind of forces and support does the enemy have?
• What is the enemy expected to do?
MISSION
• What is your unit tasked with doing? Who else (if anyone) is involved in the mission?
• When and where does the mission take place? What is the time allowed?
• Why has the mission been given to your unit?
• What is the desired end-state? Basically - what is/are your collective goal(s)?
• When and where does the mission take place? What is the time allowed?
• Why has the mission been given to your unit?
• What is the desired end-state? Basically - what is/are your collective goal(s)?
EXECUTION
• Commander's Intent
• How will the mission be conducted? Scheme of Maneuver, tasks, etc. How will the unit get to the end state?
• How will the mission be conducted? Scheme of Maneuver, tasks, etc. How will the unit get to the end state?
ADMINISTRATION/LOGISTICS
• Is ammo resupply available?
• Are medevac assets available, such as medical helicopters or ambulance HMMWVs?
• Are there any special rules for dealing with Enemy Prisoners of War (EPWs)?
• Is fire support available? Artillery, naval gunfire, et cetera?
• Is close air support available?
• Are medevac assets available, such as medical helicopters or ambulance HMMWVs?
• Are there any special rules for dealing with Enemy Prisoners of War (EPWs)?
• Is fire support available? Artillery, naval gunfire, et cetera?
• Is close air support available?
COMMAND/SIGNAL
• Are there any special rules or considerations that must be made for communications? For example - special radio rules or loadouts, smoke or flare colors and meanings, etc. If there are no special rules, this is simply listed as "SOP", for "Standard Operating Procedure".
Sample Operations Order for "Operation Steel Wolf"
The following is an operations order (OPORD) for a large-scale combined-arms mission. Note that complexity is not necessary to convey the main points of the mission. Keeping a briefing simple, while conveying the important parts, will result in more people reading it and getting more from it than from a similar but overly-complex briefing. Writing a novel in your OPORD is definitely to be avoided. If you want to include background information, put it in a separate section that is optional reading, and ensure that any important information from it is conveyed succinctly in the OPORD.
SITUATION
Recon Company was ambushed by enemy recon teams in the north. They dismounted and destroyed the immediate threats but now only have a few minutes to get into cover and hold out until reinforced by Hammer and Tango companies.
FRIENDLY FORCES:
7th Armored Battalion:
• 1x Light Armored Reconnaissance Company (dismounted with air lift capabilities).
• 2x M1A2 Company ("Hammer" and "Tango") with attached M88 and M6 vehicles.
Air wing:
• 2x CH-53, callsign 'Red Dragon'
• 1x AV-8B, callsign 'Hell Hound'
• 1x F/A-18, callsign 'Eagle'
• 2x AH-1Z, callsign 'Ugly'
Additional friendly forces are en route from the south but no ETA is known at this time.
ENEMY FORCES:
• Chedaki Mechanized and heliborne infantry, armor, aircraft. There are more enemy recon teams scattered around which will need clearing out before they can bring in reinforcements.
MISSION
• Defend Zelenogorsk from determined push from Chedaki forces.
EXECUTION
Battalion Commander's Intent
• Air should provide aerial recon of the AO in addition to tasking.
Movement Plan
• Recon company should use the Big Birds to redeploy around the AO. All aircraft should avoid going in the marked region to reduce exposure to enemy AA fire.
• Air should stay grounded until Tank Companies are ready to move.
Fire Support Plan
• Battalion has 3x MLRS at MCAS Hurricane (which can be rearmed).
• 2x AH-1Z
• 1x AV-8B
• 1x F/A-18
Tasks
• Ensure all enemy anti-tank assets are disabled or destroyed.
ADMINISTRATION/LOGISTICS
Wheeled vehicles:
• Can have their wheels repaired by action.
Armored vehicles:
• Can have their tracks repaired to orange status by action.
• Any hull/engine damage can not be repaired.
• Can have tracks and gun/turret repaired fully by M88s.
Aircraft:
• Can quickly repair/refuel once landed at the airbase inside the blue circle by action.
• Can be partially repaired/refueled by action outside of the airbase or by the M88, enough to get back to base at least.
Resupply:
• Recon infantry can resupply from their (broken) vehicles at their starting position.
COMMAND/SIGNAL
• 11th Marine Division Standard Operating Procedures
Making the Plan
One of the biggest differences in planning for a game like Arma 3, as compared to doing the same in reality, is the timeframe typically given for the planning process. The way we play Arma emphasizes rapid plan development, quick-thinking, and the fact that a good plan now is better than a perfect plan later. In reality, hours, days, or even weeks can be spent drafting up missions, with entire staffs being devoted to the processes involved.
We typically do not spend that sort of time investment. With the quantity of missions we play in a given session, spending "real world" amounts of time in planning them out would result in a month of planning to play a single session, and our operational tempo is much, much higher than that. Not to mention the simple fact that playing is a lot of fun, while overly in-depth orders are a lot of (oftentimes extraneous) work. There are exceptions for campaigns. During a campaign, we like to plan ahead and draft up operations and plans weeks before the missions even begin. We do not recommend for any future player or unit to spend this sort of time investment.
When it comes to your average session, we believe that a quick combat plan should generally take no more than 20 minutes from start to finish. This means that once you are in-game, the entire process from "reading the briefing" to "getting the 'ready' from every element leader" should typically happen in under 20 minutes. Depending on the complexity of the mission, the type of mission, the leader(s) involved, and a variety of other factors, this can often be much shorter, and occasionally a bit longer for particularly complex missions.
The breakdown of such a time period is typically as follows, though it can often go much faster depending on the complexity of the mission:
1. Read briefing (2 minutes)
2. Conduct map recon & make initial plan (6 minutes)
3. Issue orders (5 minutes)
4. Questions & comments (2 minutes)
5. Leaders brief subordinates (5-8 minutes)
6. Step off and begin the mission
As you can see, a leader is expected to be able to make a good plan in a fairly compressed timeframe. The proficiency required to make good plans in short timeframes comes from a variety of factors - one of them being a good understanding of the planning process as well as how to give good verbal orders. We'll cover that next and go from there onto various other leadership aspects.
Planning Considerations - METT-TC
When it comes to actually making the plan, one must consider a great many things in order to ensure that the best course of action is taken, with the highest probability of accomplishing the designated mission with the fewest casualties. The military has summarized these considerations into what they call "METT-TC", and it's something that any leader should become familiar with.
METT-TC consists of the following elements:
Mission, Enemy, Terrain & Weather, Troops Available, Time, and Civilians.
Being familiar with METT-TC will help to guide your mental planning process and remind you of all the key things you should be considering in each plan. As time goes on and experience is gained, these will largely become second-nature. While any military acronym such as that is intimidating at first glance, this one in particular is of great value and is worth learning, remembering, and using.
Keep in mind that METT-TC is used constantly, at all levels of the battle, whether one is conscious of it or not. You could sum it up as "the tactical situation" for our purposes - it is everything that you think about when moving around the battlefield, whether under fire or not.
METT-TC is used at the higher level while creating the 5-paragraph order cited above, and once you as a commander received that operations order, you use the same METT-TC process to help develop your own plan of action based off of what you know from the OPORD.
The difference between METT-TC and SMEAC is that METT-TC is how the situation is perceived to be at a given time (typically the present, or the time when the operation will be conducted). It is not a plan in and of itself, but rather the elements that are required to be interpreted and used to craft a successful plan. SMEAC is the plan that comes about because of that, and is based on METT-TC factors as they existed (or were predicted) at a given time during the planning process.
Once the battle is underway, you (and your subordinates) frequently reevaluate the METT-TC considerations as they change, issuing new orders as appropriate to guide your forces towards success, exploit enemy weaknesses, and generally conduct the battle to its conclusion.
Bear in mind that you should be looking at METT-TC from the enemy's perspective as well, to help give you insight into what the enemy might do with the situation as you believe they see it. Being able to "visualize yourself in the enemy's position" can be a powerful tool to use when planning for your own unit's actions.
In Arma 3 terms, the elements of METT-TC break down as follows:
Mission
As in the "5 paragraph order" described above, this deals with what your unit is tasked with accomplishing. The type of mission will determine many aspects of how you craft your plan.
The mission considerations include:
• What do you need to do?
• Why do you need to do it?
• Who is involved?
• Where is it being done?
• When is it being done?
The mission considerations include:
• What do you need to do?
• Why do you need to do it?
• Who is involved?
• Where is it being done?
• When is it being done?
Enemy
• Next up we cover the enemy.
Understandably, the enemy is a tremendously significant aspect of how you plan a mission. You must consider every tactically relevant aspect of them, such as:
• Composition.
Force composition is simply what the enemy is made of. Are they strictly infantry, or do they have mechanized support as well? Are there APCs, tanks, or even aircraft?
• Capabilities.
What kind of threat does the enemy pose with their organic and non-organic assets? Anti-aircraft and anti-tank capabilities? Artillery support? Air support?
• Number.
How many of "them" are there? A few infantry pose one type of threat, whereas a few "special forces" troops pose a different type, and a few tanks or armored personnel carriers likewise present an entirely different type of threat.
• Location.
Where are they positioned, if known? If not known, where do you suspect they might be, based on the full METT-TC?
• Posture.
Defensive? Patrolling? Alert? Attacking? Etc
When put together, these form a partial "threat assessment" for the mission.
Terrain & Weather - "OCOKA"
Terrain and weather comes next. The military mnemonic used to remember the factors used in evaluating terrain is "OCOKA". Like METT-TC, it is another good mnemonic to learn. Also, like METT-TC, you will find yourself using this almost subconsciously with a bit of experience.
OCOKA stands for:
• Observation & Fields of Fire
• Cover & Concealment
• Obstacles
• Key or Decisive Terrain
• Avenues of Approach.
Basically, these are all of the factors that dictate the suitability of any given piece of terrain, or a given terrain area. These are the elements that describe the difference between a flat, open desert, and a dense, concealing forest. Terrain heavily dictates planning, and thus being familiar with how to judge it becomes important. OCOKA helps you remember all of the elements that will matter in such a judgment.
Let's take a look at what this all means in Arma terms, from the perspective of our forces.
Observation & Fields of Fire
This is the aspect of terrain that determines the effectiveness of friendly fire coming from it, as well as the ability to observe the battlefield. When judging terrain for these aspects, you will want to pay mind of:
• Areas in which weapon systems could be employed effectively. The suitability of any given piece of terrain for usage as a support-by-fire position, or to emplace crew-served weapons, etc.
• Areas where the battlefield can be best observed. A position may not be suitable for the emplacement of a squad of troops, but if it has a great field of observation, being able to get a forward observer, forward air controller, or recon unit onto it can pay off with timely, accurate, and valuable observation of the battlefield.
• Danger areas or likely combat areas. Even if nothing about the enemy is known for certain, a "map recon" can reveal a wealth of information about where the dangerous locations are, where ambushes or enemy forces might be positioned, and more. Being able to identify where friendly forces will be most vulnerable during their movement helps you to proactively account for that with overwatch and other support methods, instead of having to be reactive when the enemy attacks you in a fashion that could have been predicted from the terrain before the battle even started.
• Defensible terrain. Defensible terrain can be a great asset for you if you can maneuver your forces onto it. On the other hand, if it looks defensible to you, there is a good chance that the enemy will think the same thing and will either put his own forces on said terrain for the same reasons, or will have a contingency plan in the event that you attempt to utilize the terrain.
Cover & Concealment
The cover and concealment afforded by terrain can be both natural (trees, bushes, broken ground) and man-made (houses, walls, ditches). As learned in the basic rifleman section, cover provides protection from enemy fire, whereas concealment simply prevents observation but has no protective aspects aside from that.
When judging terrain, keep a keen awareness of the fact that elevation differences act as a major source of cover and concealment. Large numbers of troops can move in a protected fashion thanks to the concealing nature of features like valleys, dips in terrain, or by masking themselves with hills and such. When fighting from the military crest of a hill, the ground itself becomes one large piece of cover based on the location of the enemy relative to it.
You can expect the enemy to gravitate towards locations that provide good cover and concealment from your observation and fires. Likewise, when moving, you should attempt to conduct movement in a fashion that maximizes your cover and concealment from them, as well secure fighting positions that give you good cover and concealment relative to the expected enemy threat. Naturally, all of the other factors described must be considered as well.
Obstacles
Obstacles in Arma can take several forms. Terrain itself can be an obstacle - hills that are too steep to traverse by foot or vehicle, for instance, or bodies of water that cannot be forded with the given equipment. Man-made obstacles will also make appearances - the most common are sandbags, concertina wire, and mines. Bridges fit the bill as well, and in urban areas you can expect to see civilian vehicles used to construct hasty roadblocks and attempt to impede, channelize, or otherwise redirect vehicle movement.
Obstacles are intended to prevent you from successfully moving through an area, forcing you in another pre-chosen direction that benefits the enemy, slowing you down to make you vulnerable, or simply delay you.
In some adversarial missions, a defending team will have a number of obstacles and defensive positions that can be placed to help shape the battlefield to their advantage. Crafty and skilled employment of such obstacles can cause significant headaches for the attacking team to try to surmount.
Key or Decisive Terrain
Key or decisive terrain is any terrain that gives some kind of significant advantage to any who control it. This can come in a variety of forms - dominating hills, buildings, an area overlooking a significant bridge or road, etc.
Being able to identify key or decisive terrain allows for a leader to plan how to best deny it to the enemy, or negate the effects of the enemy potentially controlling it as best as possible.
Key terrain often ends up as objectives in a mission.
Avenues of Approach
This is about what it sounds like - routes that can be used to navigate the terrain, in relation to objectives, key terrain, and anything else of significance. It is most typically in relation to the main objective of the mission.
Note that the easiest avenue of approach is not always the best. Coming in from an unexpected or unlikely direction can give your forces a level of tactical surprise that can prove decisive in a fight. On the other hand, there will occasionally be situations in which you are restricted to only one real viable avenue of approach due to a variety of influencing terrain factors. In that situation, one must remember that the only time it matters when the enemy knows what direction you're coming from is when they're able to actually do something about it to stop you. Your job in that situation thus becomes one of leveraging every possible advantage to ensure that they cannot stop you, no matter how obvious your attack avenue is forced to be.
Weather
Weather ultimately means visibility in Arma. There are several things that influence visibility, including:
• Time of day
• Moon phase (if night)
• Cloud cover
• Rain
• Fog
• Snow
Weather can change over the course of a mission, too - just because it starts off with a clear sky does not mean that it will stay that way. Likewise, if it is near dusk or dawn, visibility conditions can change dramatically over the duration of a mission as it gets darker or brighter due to the setting or rising of the sun. Note too that moonsets and moonrises at night can play a role, particularly on clear skies with full moons.
That's the end of the OCOKA/Weather considerations. Additional information about OCOKA as it applies specifically to attacking and defending follows later in the "Tactics" section. For now, let's continue on with the rest of METT-TC.
Troops & Support Available
This includes all assets available in the mission. Not only are your own troops included, but any special attachments are detailed, as are vehicles that may be supporting you, and artillery or air assets that might be available for addition on-call support. In short, this details everything you have at your disposal to get the mission done, whatever the mission may be.
This includes all assets available in the mission. Not only are your own troops included, but any special attachments are detailed, as are vehicles that may be supporting you, and artillery or air assets that might be available for addition on-call support. In short, this details everything you have at your disposal to get the mission done, whatever the mission may be.
Time Available
While you will often be free to spend a reasonably unlimited amount of time to accomplish your mission, there will also be occasions when time is a factor and certain tasks must be carried out in specific time constraints. For instance, a night infiltration mission may need to be concluded before sunrise, a patrol may need to be done before sunset, or an ambush may need to be conducted before an enemy convoy has reached a specific town.
Knowing the amount of time available in the mission helps a leader to plan out how rapidly the different phases of the mission must be carried out, which can have a significant impact on the tactics employed.
Civilian Considerations
While many battlefields will be free of civilian presence, it is not uncommon to have to account for civilians in urban engagements. Civilians can be very tricky to deal with - it behooves friendly forces to not harm them, but at the same time, there is always the possibility of insurgents working within their midst. Some civilians may be acting as lookouts for such insurgents as well. It is important to carefully detail rules of engagement when moving into an area where civilians may be present. You want to ensure that players know exactly when they can engage, and when they need to hold fire. A player should never be put in a position where he feels that he is under threat from a hostile civilian yet is unable to take action due to overly restrictive ROEs.
While many battlefields will be free of civilian presence, it is not uncommon to have to account for civilians in urban engagements. Civilians can be very tricky to deal with - it behooves friendly forces to not harm them, but at the same time, there is always the possibility of insurgents working within their midst. Some civilians may be acting as lookouts for such insurgents as well. It is important to carefully detail rules of engagement when moving into an area where civilians may be present. You want to ensure that players know exactly when they can engage, and when they need to hold fire. A player should never be put in a position where he feels that he is under threat from a hostile civilian yet is unable to take action due to overly restrictive ROEs.
Construct the Plan
After reviewing the operation order and considering METT-TC factors, the Mission Commander has two options. The first is to craft his plan by himself; the second is to ask for input from his squad and special element leaders. Typically a commander will at least ask for input from the special element leaders, as they are proficient at their roles and will have a good perspective on how they can best be employed in the mission.
After receiving feedback (if requested), the commander will begin to work up the plan. The mission assigned, of course, determines much of this. A defensive mission will require the commander to deal with a different set of concerns than an offensive one, and his planning will reflect that.
In general, he will detail the movement routes that the elements will use via marking up the map, establish what squads or elements will be dictating the pace of movement, decide on the rules of engagement, usage of vehicle assets and how they will be distributed amongst the squads, designate recon elements as required, determine rally points or staging areas, as well as any changes to standard operating procedure - such as a non-typical method to use when a given battle situation happens. Generally, standard operating procedure (SOP) are expected to be known by all leaders, and will not be briefed unless considered to be of particular importance to the given mission. For example, a mission which lists artillery as a threat to the platoon may have the PltCo take some extra time to discuss the battle drill they will use to react to the artillery if it engages them.
Depending on the mission type, he will also dictate defensive positions, sectors of responsibility, base-of-fire positions, usage of fire support assets, designate special units to support other units or attach to them, and so on and so forth.
How Far to Plan Ahead
The commander must decide on how far ahead he'll do detailed planning. Since plans have a tendency to "not go according to plan" once bullets start flying, it can be helpful to only plan specifically for the first major part of the mission, then give general guidance for the rest of it. This allows the commander to consider updated METT-TC concerns once the first section of the mission has been successfully completed, and issue new orders based upon what actually happened, versus what the planned outcome was. Allowing for flexibility at the lower level tends to result in more "adapting to the situation" and prevents units from carrying out a plan that may not be the best course of action based on the actual vs expected tactical situation.
Key Decision Points
Generally, the commander will attempt to identify key decision points in the mission, and plan his orders around them. For instance - if his unit is attacking, he may decide that a key decision point exists when the unit secures the initial objective. At that point, he knows that he has to direct the positioning of the subordinate units in anticipation of a counter-attack, or to "mop up" any stragglers left on the objective area.
When describing a key decision point in a briefing, the Mission Commander will give the most likely courses of action as options for the subordinate leaders to be aware of - in the above example, these options would be:
1. Get the subordinate units into defensive positions in anticipation of an imminent counter-attack, maintaining security in the event that some hostiles remain in the objective area, and using a single element to clear while the rest of the troops defend
2. Conduct a detailed 'mop up' of any stragglers that may be left in the objective area with all available forces before going defensive.
Giving them as options allows the junior leaders to consider what they will need to do in either eventuality and prepare for it.
Commander's Intent
A "Commander's Intent" is a helpful guideline to give the unit direction during the mission, even in the absence of orders. The idea behind the "Commander's Intent" is that all levels of the unit should be familiar with what the "big picture" of the mission is, and what the desired end state is.
Knowing the "Commander's Intent" gives tactical flexibility to all players, and especially leaders, in the platoon. It allows for tactical decisions to be made even when it is impossible or impractical to get direct orders from the mission command element. This can play a major part in radio-lite missions where communications are severely restricted (by design) and all leaders have to exercise more small-unit initiative and leadership. It also protects against loss of leadership - if a senior leader becomes a casualty or loses comms, the junior leaders still know what they are supposed to be doing and why, and they'll be able to quickly adapt and continue on.
Knowing the "Commander's Intent" gives tactical flexibility to all players, and especially leaders, in the platoon. It allows for tactical decisions to be made even when it is impossible or impractical to get direct orders from the mission command element. This can play a major part in radio-lite missions where communications are severely restricted (by design) and all leaders have to exercise more small-unit initiative and leadership. It also protects against loss of leadership - if a senior leader becomes a casualty or loses comms, the junior leaders still know what they are supposed to be doing and why, and they'll be able to quickly adapt and continue on.
ISSUING ORDERS
Issuing orders verbally - also known as a 'verbal briefing' - requires that the speaker be familiar with a few basic premises.
When issuing verbal orders, a leader must...
• Announce himself and get the attention of his junior leaders before beginning his orders. As a Mission Commander, you can simply ask for each subordinate leader to identify themselves, then begin your order once each leader has reported in. If you start talking before you know that people are listening, it may force people to play auditory-catch-up, which can lead to missed orders and confusion over what was said. Once in-mission, regardless of leadership level, it can be helpful to use a prep word like "Orders" before issuing any orders. This allows junior leaders who are in the middle of combat to catch that word being spoken and listen up to hear whatever orders are about to be passed.
• Use clear and unambiguous language. Vague statements lead to confusion and are open to interpretation. Being specific helps to avoid any issues that might stem from misinterpretation or confusion.
• Be concise. When employing clear and precise tactical language, a lot can be said with a few standard words. Lengthy, meandering orders can be difficult to follow and do not have the same focused impact that concise orders do.
• Set clear, quantifiable goals that junior leaders understand and can work towards. The more your junior leaders know about what their goals are, and the better they can quantify them, the better they will be able to judge their effectiveness in the scope of the larger mission. Clear goals give them something to work towards and let them know when they've accomplished their task.
• Strive for elegance through simplicity. The more complicated a plan becomes, the more chance there is for it to fail. On the other hand, complexity is sometimes required to achieve a difficult objective. A leader must be familiar with the concept of "how much is too much" and be comfortable working within those boundaries.
• Convey his "Commander's Intent". "Commander's Intent" is simply what you intend for your unit (Battalion, Company, Platoon, Squad, etc) to do in the scope of the mission, as described in the above section. This allows for junior leaders to exercise judgment in the mission more easily.
• Ensure that his orders were understood. The best way to do this is to ask an element leader to "read back" what their orders were. This way, any misunderstandings between what was said by the leader and what was heard by the junior can be resolved before bullets start flying and it's too late.
• Allow time and opportunity for questions. Giving junior players an opportunity to ask questions ensures that they go into the mission knowing everything that they think they need to know, at a level of comprehension acceptable to them.
• Ask questions if necessary. By the same token, if in doubt about anything, a leader should not hesitate to ask questions of his subordinates.
• Solicit the input of the leaders of subordinate elements and special types of units (ie: air crews, recon elements), as desired. Giving your subordinate leaders an opportunity to chime in regarding the plan, their role in it, et cetera, brings a variety of perspectives to the table and generally results in good feedback and suggestions.
Note that once in-mission, it is often helpful for a leader to find the person he is giving orders to, have them come to his position, and then explain his orders while showing the subordinate the terrain involved. This helps to let the subordinate see the terrain from his leader's point of view, so that he can better achieve the intent of the order. For instance - if the Mission Commander wants to have a unit advance along an aspect of the terrain that is not obvious from a map, but is obvious from where he is standing, this method works very well.
Issuing the Orders - The Command Brief
Once the mission briefing has been received, METT-TC factors have been considered, and a plan has been drafted up, it's time for the orders to be issued to the next junior level of command. Depending on the player count and force structure, this may start at the Battalion Commander, trickle down to the Company Commander, then the Platoon Commanders, then their Squad Leaders, and finally the Fireteam Leaders.
To begin, an accountability check is done to ensure that all leaders are present at whatever location has been chosen for the command briefing - typically the starting location of the highest commanding element in the mission. For the sake of this, we'll assume it's a Company-level mission.
To begin, an accountability check is done to ensure that all leaders are present at whatever location has been chosen for the command briefing - typically the starting location of the highest commanding element in the mission. For the sake of this, we'll assume it's a Company-level mission.
CoyCo:
"Do I have my element commanders here?"
Tango Co:
"Tango company here."
(Air elements - Ugly, Eagle, Red Dragon, and Hell Hound - check in as well)
CoyCo:
"Ok, we're all set. Orders to follow."
"Do I have my element commanders here?"
Tango Co:
"Tango company here."
(Air elements - Ugly, Eagle, Red Dragon, and Hell Hound - check in as well)
CoyCo:
"Ok, we're all set. Orders to follow."
The next thing a leader must do is provide orientation. This is done to get everyone 'synced up' as to where they are and what they'll be doing. This can be as simple as giving a brief description of where the unit starts off, and what direction the objectives are.
CoyCo:
"As you can see on the map, we're assembled at MCAS Hurricane. Recon Company has been cut off in the south-west and requires assistance. While we know roughly where they start, we can expect them to be mobile and evading enemy forces shortly after the mission begins."
"As you can see on the map, we're assembled at MCAS Hurricane. Recon Company has been cut off in the south-west and requires assistance. While we know roughly where they start, we can expect them to be mobile and evading enemy forces shortly after the mission begins."
After orientation, the key parts of the mission briefing are reiterated verbally. This simply consists of the CoyCo rephrasing the operations order into his own words.
CoyCo:
"Our main objective is to form an armored column, head south-west, and rendezvous with Recon Company in order to extract them safely to friendly lines. Our secondary objective is to destroy any enemy units attempting to push North into our territory."
"Our main objective is to form an armored column, head south-west, and rendezvous with Recon Company in order to extract them safely to friendly lines. Our secondary objective is to destroy any enemy units attempting to push North into our territory."
After reiterating the mission briefing, the Company Commander will detail his "Commander's Intent". This helps to frame the upcoming detailed orders.
CoyCo:
"My intent is to utilize our close air support assets in three ways: One, to locate the recon company, support it, and guide our armor column to it. Two, to provide route reconnaissance and security for the armor column during its movement. Three, to provide forward reconnaissance and advance warning of any enemy air or ground threats attempting to move into the area of operations. Tango Company will conduct a road movement north towards the last known position of recon company, locate them, support them, and secure the area so that they can be airlifted out by Red Dragon. From there, we will adopt as necessary to defend against the enemy attacks, using our mobility to redeploy throughout the area of operations in response to enemy movements."
"My intent is to utilize our close air support assets in three ways: One, to locate the recon company, support it, and guide our armor column to it. Two, to provide route reconnaissance and security for the armor column during its movement. Three, to provide forward reconnaissance and advance warning of any enemy air or ground threats attempting to move into the area of operations. Tango Company will conduct a road movement north towards the last known position of recon company, locate them, support them, and secure the area so that they can be airlifted out by Red Dragon. From there, we will adopt as necessary to defend against the enemy attacks, using our mobility to redeploy throughout the area of operations in response to enemy movements."
After the commander's intent has been given detailed orders are passed. Each platoon receives it's assignment and any special guidance required. This is the CoyCo's own SMEAC operations order, delivered verbally.
CoyCo:
"Tango company, your objective is to move as rapidly as possible to Recon Company's location in order to support them and facilitate their extraction. Ensure that your elements are exercising strong visual identification before engaging targets - we don't want to shoot up our own guys.
Hell Hound, you will be supporting Tango Company as it moves north. Tango will have a Forward Air Controller (FAC) that will direct you on targets as needed.
Eagle, you will be blocking enemy air assets to the north, as well as providing recon in that area. Tango or Recon FACs may retask you, but remember that your main role is to defend us against enemy air attack.
Ugly 1 and 2, your initial goal will be to locate Recon Company and convey their location to Tango Company. From there, you will provide support and recon, utilizing your low-level flight to complement the higher-altitude operations of Hell Hound and Eagle. You will also be tasked with clearing out and providing security for the Red Dragon element's landing zones.
Red Dragon 1 and 2, you will set yourselves up safely out of harm's way and await Recon Company's calls for extraction. After Ugly or Tango have secured an LZ, you will pick up Recon Company and transport them wherever they need to go.
If there are any questions, ask them. If not, go ahead and brief your elements. Report in when you're ready to roll."
Issuing the Orders - Platoon Brief
Recon Company Commander:
"Recon, we're in a bad situation. The enemy has disabled our vehicles, rendering us foot-mobile. We have support coming from MCAS Hurricane in the north, but it will take some time to get to us. Enemy forces are likely to be attacking us before they arrive.
Alpha squad, I want you dug in protecting our northern side. Bravo and Charlie will provide flank security, while my headquarters element will be observing north for any signs of our friendly reinforcements.
It is possible that we will need to withdraw further north in response to enemy attacks. If so, Alpha squad will provide heavy fires while Bravo and Charlie withdraw to the next suitable position of cover via bounding overwatch. Once Bravo and Charlie are set, Alpha will fall back to them.
In the event that we see friendly aircraft, our signal method will be to deploy colored smoke on our location. We can expect to be extracted by the Red Dragon element once friendlies have located us and secured a landing zone - while you should try to mount your squads into the same aircraft when possible, speed is of the essence - I would rather us be on the ground as short as possible, so if need be, just pull whoever is nearby into your aircraft and we'll leave once we know all of Recon is mounted up.
Remember that the enemy could be attacking from any direction. We are operating under universal ROE - don't be hasty to engage, identify your targets, and coordinate your fires. "
As the orders are completed, the PltCo opens the floor to questions about the plan.
Recon CO:
"Are there any questions?"
Alpha SL:
"If an enemy vehicle is disabled but still has an operation turret, are we able to use it to defend ourselves?"
Recon CO:
"(Alpha SL) brings up a good point. Due to the abundance of friendly support aircraft, we will not be using enemy vehicles in anything other than a last-ditch capacity. If an enemy vehicle is occupied by friendlies, immediately inform me so that I can pass the information up to our close air support and armored elements. Remember, usage of enemy vehicles involves high risks of friendly fire - and with our close air support and tank units, the risk is far greater than normal. Try to avoid this at all costs."
Are there any further questions?
...
If not, brief your squads and let me know when you're ready to move out."
Issuing the Orders - The Squad Brief
Once all questions have been asked and answered, the PltCo will send the squad leaders and element leaders back to their squad/element channels so that they can brief their subordinates.
Alpha Squad Leader:
"Alpha, listen up. I have my fireteam leaders listed as (team leader 1 name) and (team leader 2 name). Is that correct?"
Fireteam Leaders:
"Yes Sergeant."
"Aye Sergeant."
Alpha Squad Leader:
"Our orders are as follows. We will be the primary defensive element, oriented south of our starting location. I need everyone with anti-tank to be prepared to use it, and well-dispersed into as good of cover and concealment as you can find. Bravo will be on our left flank, and Charlie on our right. Our intent is to hold our position from expected enemy attacks from the south, buying time for friendly air or armor to find us.
In the event that we cannot hold this position, Bravo and Charlie will withdraw south while Alpha will provide covering fire. After they are set, we will withdraw to their location and assume a northern defense again.
Remember that enemy can be approaching from all directions. Keep at least one person in each fireteam watching our flanks and rear. We are operating under Universal ROE - particularly when dealing with enemy vehicles, let them get close enough to where you won't miss with your AT - we don't have much of it.
Avoid occupying enemy vehicles except in the most dire of circumstances, and if you do, immediately inform me so that I can pass this up to higher headquarters. Friendly fire from the air and armor is a major consideration for why we should avoid occupying anything other than friendly vehicles.
When Big Bird arrives to extract us, we'll mount in the closest aircraft. I am more concerned with us all getting mounted than I am in us all being in the same aircraft.
Are there any questions?"
Alpha 1 Fireteam Leader:
"How long are we expecting it to take for friendlies to find us?"
Alpha SL:
"That's hard to say. We should expect to see friendly aircraft well in advance of any friendly ground forces. Our main problem will be signaling the aircraft to show them our location - colored smoke will be employed by the platoon headquarters element to try to facilitate that.
Any further questions?
...
Stand by for mission start."
Alpha SL, on command net:
"Command, this is Alpha. We're good to go."
Recon CO, on command net:
"Roger that, stand by."
Final Checks
While element leaders are briefing their elements, the mission commander will give any special guidance to his own element. Once done with that, the mission commander will spend the remaining time going over the plan he created, thinking about the problems that might arise, how to address them, and generally trying to anticipate as much as possible and be ready to adapt and be flexible.
Once all element leaders give the "Ready", the mission begins, and the mission commander's job becomes one of supervision, constant assessment of the tactical situation, and adjustments to the plan in a timely fashion as needed.
Once all element leaders give the "Ready", the mission begins, and the mission commander's job becomes one of supervision, constant assessment of the tactical situation, and adjustments to the plan in a timely fashion as needed.
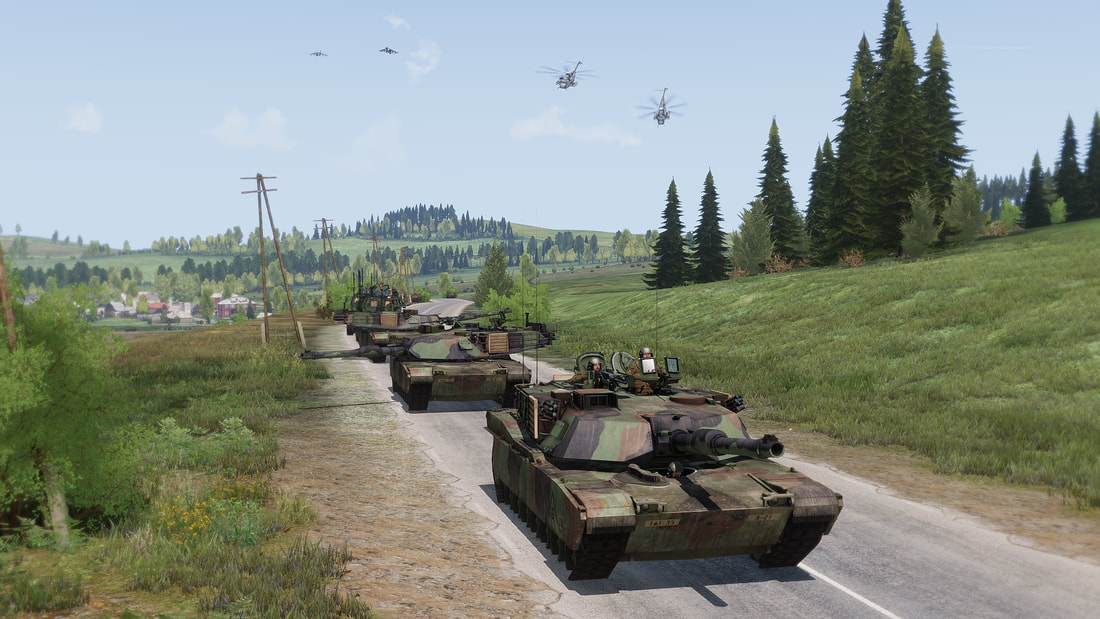
Notes on Receiving Orders
When receiving verbal orders, a player must...
• Read the operation order before the briefing begins. It is crucial that all leaders have read the OPORD before the verbal briefing begins. This gets everyone on the same page and allows for the plan to be communicated more clearly and understood by all involved.
• Write down anything important that you may need to remember later. This could be the responsibilities of specific elements, the formations used, what vehicles have been assigned to your element, et cetera.
• Think of what issues might arise with the orders being given. Is there anything that you can think of that needs mentioning or clarification?
• Listen to what the other elements are being told to do and ensure you are familiar with the full plan. It is extremely rare for anyone to operate in a vacuum where the actions of other friendly forces have no impact on them. Because of this, it is important to be familiar with the full plan - what you are doing, as well as what everyone else is doing.
• Assume nothing. Ask questions if you are unclear on anything. It is the responsibility of all players to ask questions that help them to fully grasp what their orders are. Don't hesitate to do so - asking questions before the fighting starts will make you that much more effective once things start heating up. It is very important that you are comfortable with your understanding of what you are being tasked to do.
• Read back what you understand your orders to be. A 'read back' is a technique by which a subordinate repeats the plan as he understands it to his leader. Doing this allows both the leader and subordinate to know that they have the same understanding of the plan. If any discrepancies appear, they can be dealt with easily.
• Avoid distractions. Being distracted during a verbal briefing is a sure-fire way to misunderstand something or miss out on key information.
Tactical Decision-making
The job of a leader becomes one of execution, supervision, adaptation, and flexibility once the mission begins. With the operations order as a guideline, each leader ensures that his element's part of the plan is carried out to the best possible degree. Whether a fireteam leader, squad leader, platoon commander, or company commander, every leader shares a set of common responsibilities that scale with their level of leadership.
General & Pre-combat
The first of these responsibilities is simply those things that any leader must be on the watch for throughout the mission. In the pre-combat phases of a mission, leadership is concerned with a variety of things that are intended to maximize the chance for friendly success while at the same time minimizing the possible influence or impact of the enemy.
• Where is the enemy? Finding the enemy is always extremely important. If you were in his position, where would you be?
• Are elements moving according to orders? If they are not, find out why from the senior member in charge of the given element(s). If their reason is a valid tactical consideration, shift their orders to account for it. If they have no reason and have simply 'goofed', redirect them towards the proper course of action.
• Are the formation and intervals being employed appropriate to the terrain and enemy threat? If not, remind the element leaders of the desired formation and interval, and ensure that it is understood and executed. Ensure that you continually evaluate the terrain and take full advantage of what it provides.
• Are the elements within supporting distance of each other? Particularly at the higher levels, it is important to ensure that fireteams and squads maintain mutual support when moving, in accordance with the operations order. A squad or fireteam that is off on its own can be cut off, surrounded, and destroyed before the other squads or fireteams can react and move into supporting distance. Maintaining overwatch and mutual support is a key factor of preventing any given element from being 'fixed' and destroyed by the enemy. The terrain will determine how much distance equates to 'supporting distance' - in close terrain it will be much shorter than in more open terrain, and the weapon systems being used will likewise have an impact due to their effective ranges.
• Are there any gaps or weaknesses that the enemy could exploit? Is security being maintained, especially when moving? When doing large coordinated movements, it's important to ensure that no gaps form in the movement formation. Leaders should pay attention to the spacing of the elements, the drift that can naturally occur from movement in rough terrain, and adjust accordingly to ensure a solid collective formation.
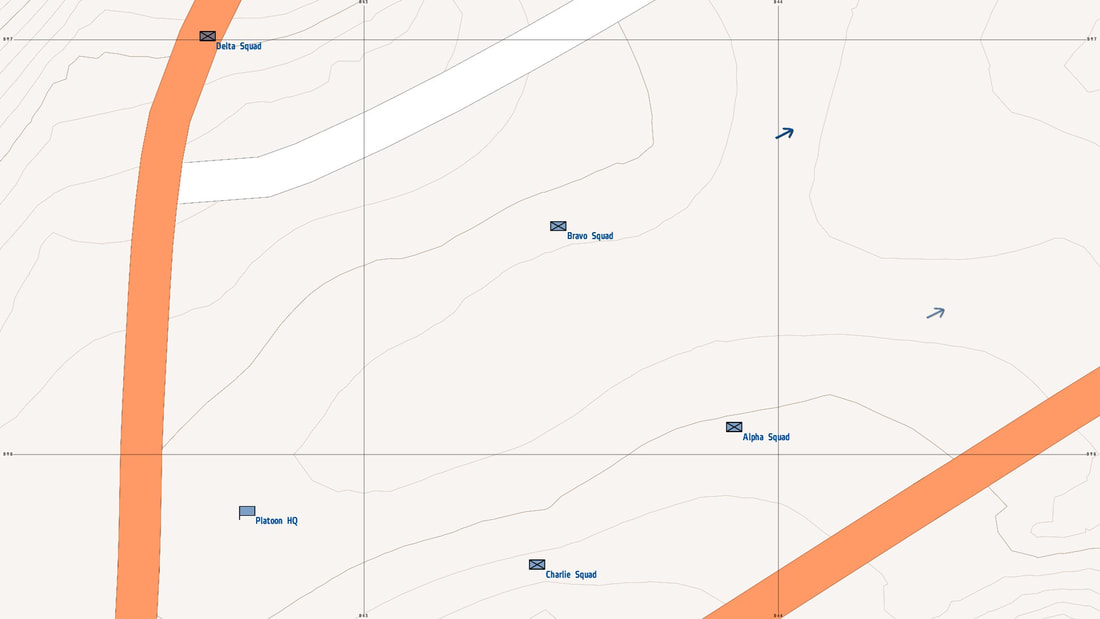
In this example, a gap has developed between Bravo and Delta squads. Noticing this before it becomes a problem is an important part of being a leader.
• Are key elements (ie: anti-tank) moving in a position from which they can do their job with short notice? If important assets are lagging behind the formation or are otherwise out of place, the whole formation will need to slow down to accommodate them. Stumbling onto enemy armor when your AT assets are slogging hundreds of meters behind the main formation is not a situation you want to ever get into.
• Is a point element being used? If not, should one be designated? Is recon being properly utilized?
• Does everyone know what to do when contact is made? While this will often be a "SOP" reaction-to-contact drill, there will also be times where specific guidance will need to be given about what to do if contact is made in a specific fashion, or in a particular area. For instance, it may be necessary to 'fight through' any contacts due to a variety of METT-TC considerations, versus getting bogged down in a firefight with them. Knowing this, players will be able to conduct a running firefight as their first reaction, instead of having to be specifically ordered to.
• Are the rules of engagement clear? If in doubt, restate them to your junior players. While the concepts of 'Universal ROE' will protect you from common mistakes, it never hurts to ensure that everyone is crystal clear on the ROE - better to be safe than sorry.
• Is the situation as described in the OPORD? If not, do changes need to be made? Despite best efforts, the operations order may sometimes be incorrect due to faulty intel, a mis-read map, or similar. It is important that leaders are able to identify discrepancies between "what we're supposed to see" and "what we actually see" and react accordingly.
Combat
Once combat has begun, leaders work to get an understanding of the tactical situation so that they can employ their troops most effectively. The higher the leadership level, the less they are concerned with actually fighting, and the more they are looking to find weaknesses in the enemy and exploit them, as well as cover any deficiencies that have developed in their own forces.
In combat, leaders pay attention to the following aspects. All of these help them to size up the situation, make tactical decisions, and issue orders appropriate to the situation at hand.
In combat, leaders pay attention to the following aspects. All of these help them to size up the situation, make tactical decisions, and issue orders appropriate to the situation at hand.
• Where is the enemy? How many of them are there? What weapons and special assets do they have?
• Have your troops deployed properly? Are they taking up good positions? If not, are there better positions nearby that they could fight to? If so, conduct a tactical maneuver towards the new position and continue to fight from there.
• Has fire superiority been achieved? Is the enemy being suppressed? Are they fixed by your fires?
• Are special assets, such as attached teams or vehicles, "in the fight"?
• Can any supporting assets be brought to bear? Artillery and CAS, if available, should be utilized whenever feasible.
• Considering the initial enemy and friendly situation, can you win the fight from where you are, with the tactics you're currently employing or plan to employ? Is there a better way, and if so, what would be required to execute it?
• Are friendly flanks protected and has 360° security been established? Are troops watching for the enemy's flanking attempts?
• Are there any vulnerabilities with how the enemy has positioned himself? Anything that you can exploit to gain a tactical advantage over them? What about the enemy's flanks or rear?
• What friendly elements can be maneuvered? What elements can support? Where can a SBF or BOF be positioned, and what options does the terrain give you? Should you flank the enemy? Pincer them? Assault?
• What is the enemy currently doing, and can you prevent him from being effective? Are you preventing him already?
• What is the enemy likely to do? How can you best prevent the enemy from being effective if he does what you think he will do?
• How is the fight progressing? Are casualties being dealt with appropriately? Can you still win the fight? If not, break contact and disengage per "Anatomy of a Firefight" in the "Tactics" chapter of this guide.
Post-Combat
After the fight has been won, leaders work towards consolidating, establishing security, finding out the status of all units, and then getting their troops into shape to fight again if need be. They ask themselves the following questions as soon as the post-combat phase begins, and take whatever action is necessary to correct any issues that may exist.
• Has security been established? Nothing should happen until it has been. Security includes checking the enemy to ensure that they're dead or captured, moving to the best positions possible, going firm, and establishing a 360° perimeter security screen around friendly forces.
• What is the status of friendly forces? Get situation reports (SITREPs) as well as more detailed ACE reports from all elements as time and the situation allow.
• What is the status of friendly forces? Get situation reports (SITREPs) as well as more detailed ACE reports from all elements as time and the situation allow.
Ammunition
• How much ammo remains? Is it enough to be effective in the current mission?
Casualties
• Wounded.
• Killed.
• Killed.
Equipment
• Vehicles & status.
• Anti-tank capability remaining.
• Special equipment (ie satchels) remaining.
• Hostile weapons acquired, what exactly they are, and what teams have them. Ensure that all friendly forces are aware if enemy weapons are being employed by friendlies, as this lessons the chance for friendly fire.
• Anything lost of significance.
• Is medical aid needed? Are medics tending to casualties already, and are they able to tend to the wounded effectively with the gear they have? Has an aid station been established? Is 'medical clustering' being avoided?
Does the friendly force need any reorganization?
• If leadership casualties were taken, have replacements stepped up and taken charge of their respective elements? If so, what are the names of the new leaders?
• If KIA's have been sustained, do any elements need to be merged with other ones to bring them back to an effective state? An attritioned fireteam of two people is better merged with a healthy fireteam than left by itself, for example.
• Do key weapons and ammo need to be redistributed? This will be based largely on the ACE reports received.
• Have key weapon systems been recovered from any KIAs?
• Has ammo been collected from any KIAs?
• If one squad or element has more ammo than another, redistribution of the ammo can be done if the tactical situation allows.
• Have key weapon systems been recovered from any KIAs?
• Has ammo been collected from any KIAs?
• If one squad or element has more ammo than another, redistribution of the ammo can be done if the tactical situation allows.
• What is the next step in the mission, and what needs to be done to prepare for it? Since missions usually involve more than one combat engagement, it is important to remember that everything you do post-combat is meant to get you back into shape to fight another engagement.
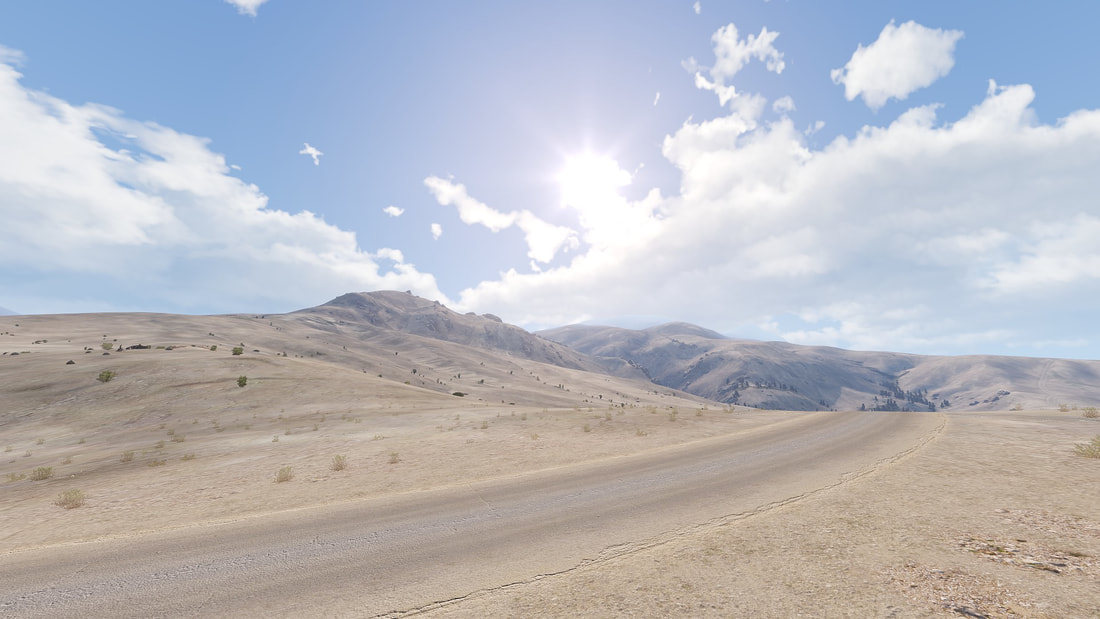
Common Leadership Concerns
This section is oriented around dealing with some of the more common concerns that can arise regarding leadership.
Stepping Up After Leadership Casualties
One of the simplest realities of combat is that leaders are not invincible. There will be times when a fireteam leader, squad leader, or platoon commander become unexpected casualties. Because of this, it is important that all players know the jobs of those above and below them, and are able to "step up" and take command of a higher level of leadership than they initially started the mission as. The ability to properly "step up" and take charge can often be the difference between victory and defeat in a tough situation. Nobody plans to lose a leader at a key moment, but with a proper understanding of the steps required to deal with this, the negative effects of a loss of leadership can be minimized.
Seniority
Seniority in our group is a simple, easy to understand hierarchy, as detailed below from most senior to least. Seniority goes in order by roles & ranks - from the Company Commander (Captain) to the Company Executive Officer (1st Lieutenant), then the Platoon Commander (2nd Lieutenant), to the Platoon Sergeant (Gunnery Sergeant / First Sergeant), then Alpha, Bravo, Charlie and Delta squad leaders (Sergeant), and within each squad, the first, second, third and fourth fireteams (Corporal). In the event that it ever gets passed that, it simply becomes the most senior remaining member of the platoon, regardless of position.
• CoyCo / CoyXO -> PltCo / PltSgt -> ASL/BSL/CSL/DSL -> A1/B1/C1/D1 FTLs -> Next senior member
Fireteam Member to Fireteam Leader
Transitioning from a fireteam member to a fireteam leader can be intimidating for those who are new to leadership or otherwise have little experience as a leader. In the end, however, it is not as difficult as it seems - as a fireteam member, you typically always known what your fireteam's plan or role in the squad's mission was. When it's necessary to step up and become the new fireteam leader, follow these actions to conduct the transfer of leadership effectively.
Actions on Taking Command of a Fireteam
1. Announce on comms that you are taking command of your fireteam due to the prior Fireteam Leader being killed. Ensure that both the squad leader and your own team members hear you.
2. You have three main options at this point:
• Continue carrying out Squad Leader's last orders if appropriate
• Ask for and wait for new orders
• Exercise disciplined initiative in accordance with the SL's intent to get your fireteam out of trouble or into a better position to accomplish the assigned mission.
Fireteam Leader to Squad Leader
Transitioning from a fireteam leader to a squad leader is a bit more difficult of a transition. If the squad leader was clear in giving his orders and initial briefing, you should know what the squad's plan and role in the mission was, which helps to smooth the transition. When it's necessary to make the transition from team leader to squad leader, follow these actions.
Actions on Taking Command of a Squad
1. Announce on the squad net that you are taking command of the squad.
2. Issue immediate orders. Depending on the situation, you will take one of two immediate courses of action, as described:
• Continue the current squad mission, or transition into a hasty assault, defense, or disengagement if necessary. Sometimes you have to take command 'in stride', such as when in the midst of an assault. You can worry about the nitty-gritty details after you have completed the current mission, or reach a natural pause in the action.
or...
• Seek out and go firm at the nearest suitable cover & concealment. If the situation allows for it, going firm is a great way to get a handle on the squad situation.
3. Report to the platoon commander over comms to tell him that you have taken command of your squad due to the squad leader having been killed.
4. Ask for CASREPs from your squad if you are unclear on the squad's status. The CASREPs will give you an idea of the fighting strength remaining in the squad.
5. Based on the CASREP responses, assess the combat effectiveness of your squad.
6. Give a SITREP to PltCo based on your assessment.
7. Continue previous squad orders unless told otherwise by the PltCo.
Note that when taking squad command, you may or may not want to designate a new fireteam leader for your fireteam. It is generally a matter of personal preference whether this is done, and either way can work.
Squad Leader to Platoon Commander
Moving from a position as a Squad Leader to that of the Platoon Commander is the most difficult transition. Fortunately, it is also a fairly rare one to have to make - good Platoon Commanders don't generally put themselves in positions from which they're likely to become a casualty.
As a squad leader, you were present for the mission briefing, which means that you know what the plan is. You've also been on the command channel listening to all the updated orders and situation reports throughout the mission. This knowledge allows for you to be able to take command and get the squads working towards accomplishing the current mission with the minimum of fuss.
The actions for assuming Platoon Command are as follows.
Actions on Taking Command of the Platoon
1. Announce on comms that you are taking command of the platoon.
2. Issue immediate orders. Depending on the situation, you will typically take one of two immediate courses of action, as described:
• Continue the current mission, or transition into a hasty assault, defense, or disengagement if necessary. If in the midst of a coordinated assault or other action where 'wheels are in motion' and things are otherwise seeming to go to plan, continuing with the mission is the best course of action to take.
or...
• Have the platoon 'go firm' at the nearest suitable cover & concealment while you reassess the situation. This is only done when a temporary halt is not detrimental to the overall effort.
3. Tell your squad on your squad net that you have taken PltCo.
4. Assign a new Squad Leader if necessary to replace you and free you up to solely act as PltCo.
5. Ask for CASREPs/SITREPs from squad leaders, if necessary to get a better handle of the situation. Using the CASREPs/SITREPs from your squad leaders, conduct an assessment of the situation.
6. Based on that assessment, issue new orders, continuing the mission in the Commander's Intent as stated in the original briefing.
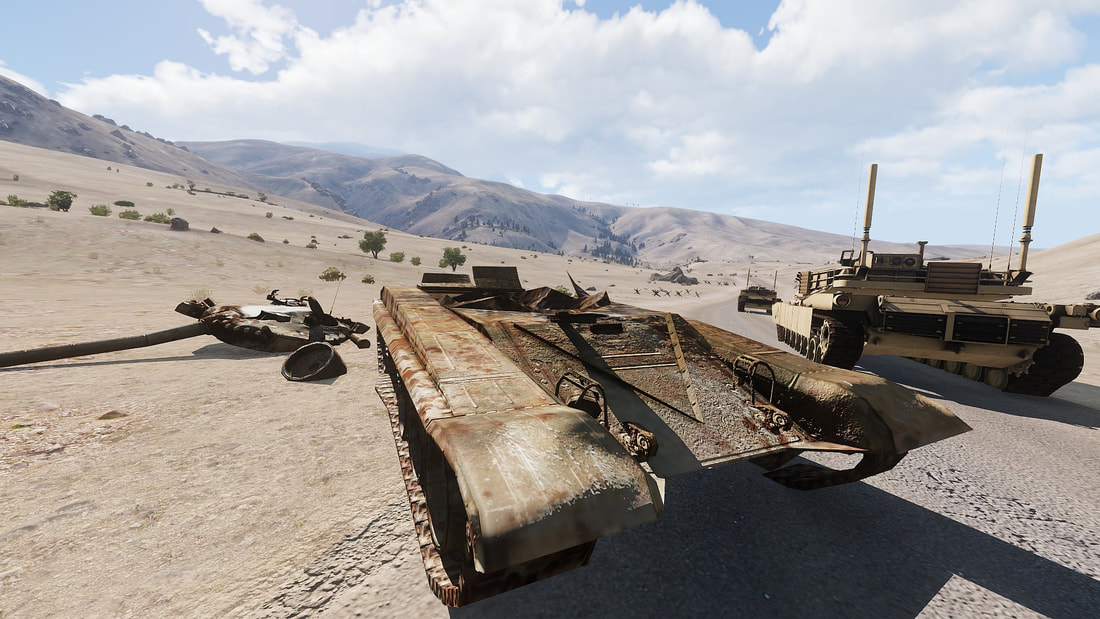
Encountering Armor Without Anti-Tank Capabilities
As the "Close Combat Marine Workbook" states, "Without anti-armor at the Platoon level, a Platoon encountering armor is either overrun or retreating". This sums up one of the most difficult challengers a leader can face - that of dealing with enemy armor without anti-tank capabilities. There generally aren't any easy ways to deal with this, which makes it all the more difficult for a leader to handle.
Guidelines
• Stay stealthy if not detected. If the armor doesn't know you're there, the risk is minimized though not eliminated. If undetected, it is wise to take advantage of that fact and maneuver to the best possible defensive or concealing positions before the armor notices you.
• If the armor has detected your forces, break contact (using smoke if available) and move immediately into hard cover or good concealment. The more cluttered and restrictive the terrain is, the better it will be for friendlies.
• Evaluate what possible anti-tank options you may have available, as described below.
Without an organic anti-tank capacity at the platoon, squad, or fireteam level, one must be creative to counter enemy armor. Depending on the strength of the enemy armor, these may be more or less successful.
• "Make-Do" Anti-Armor - UGLs, satchel charges, scrounging for enemy AT. Marines make do, and UGLs work adequately against light armor, though they will require a number of hits to show an effect. Satchel charges can destroy most armor, but they are very difficult to employ if the armor is aware of friendly positions. Scrounging for enemy AT assets can work well, provided that there are enemy casualties within range of friendlies, and that they're carrying their own AT assets.
• Call in CAS or arty if available. If they are available to the platoon, both CAS and artillery support can do wonders in countering an armored threat.
• Break contact, using smoke if spotted, stealth if not. If there's no other way to deal with the armor, your best bet is to get everyone out of the area as expeditiously as possible, maximizing the use of stealth, smoke, and careful usage of cover & concealment. Alternatively, if you cannot maneuver away, simply keep forces hidden and hope for the best.
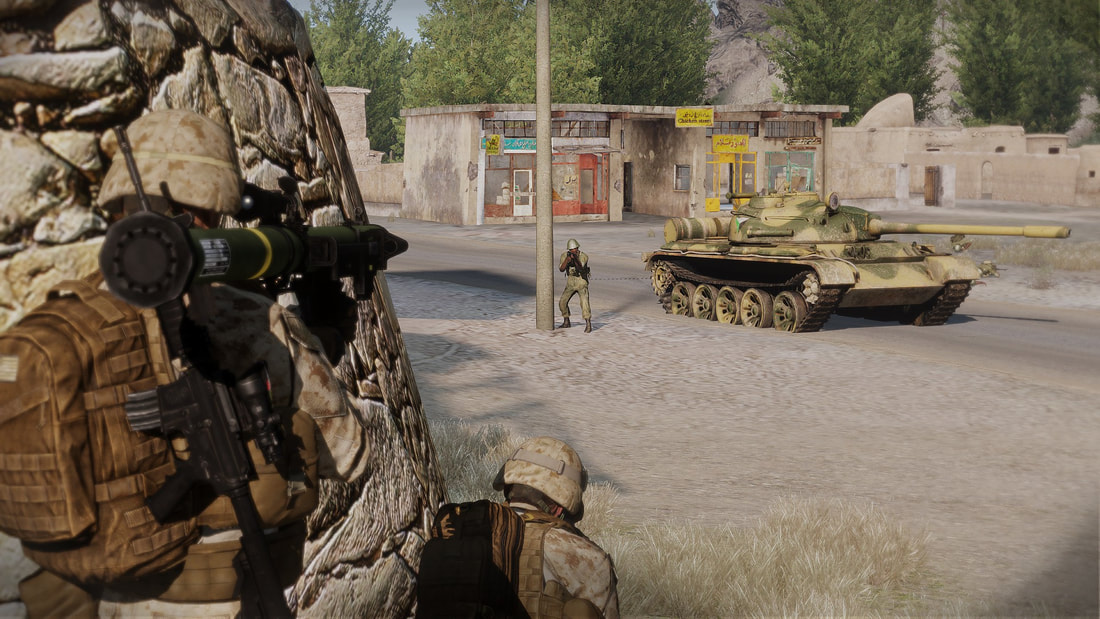
Identifying & Dealing with Combat Ineffectiveness
Combat ineffectiveness means that an element becomes "combat ineffective" if it is no longer able to carry out the specific mission it has been assigned, or the types of tasks typically given to an element of its size. If an element is left in a combat ineffective condition, yet still tasked out with doing things that a 'healthy' element would be more appropriate for, the risk of losing the element entirely becomes a significant danger.
Being able to recognize a "combat ineffective" element and take appropriate steps to salvage it is a critical leader skill to have. The more fierce the fighting, the more important this becomes.
Being able to recognize a "combat ineffective" element and take appropriate steps to salvage it is a critical leader skill to have. The more fierce the fighting, the more important this becomes.
Causes of Combat Ineffectiveness
There are several things that can cause combat ineffectiveness. The main ones are as follows.
• Loss of leadership
• Heavy casualties (KIA, or WIA needing tending)
• Insufficient ammunition or weapons to deal with current threat
• Loss of leadership
• Heavy casualties (KIA, or WIA needing tending)
• Insufficient ammunition or weapons to deal with current threat
Identifying A Combat Ineffective State
As a leader, you can identify combat ineffectiveness by paying attention to some key indicators. The primary ones are as follows. While there are multiple things that can cause each of these issues to occur individually, the combination of several of them typically points to a state of general combat ineffectiveness.
Indications of Combat Ineffectiveness
• Extremely sluggish or non-existent coordinated movement. If the element is unable to move in a coordinated fashion, or move in general.
• Lack of response after giving orders. If the sub-element leaders are no longer speaking in response to your orders, you have potentially incurred leadership casualties, or the situation has become so demanding that your sub-element leaders do not have time to talk. Neither is good.
• Lack of response when asking for replacement leaders to step up. If the sub-element leaders have become casualties, and there is no response when prompting for their subordinates to assume their roles, you are very likely looking at a critical casualty level in the overall element, and the associated lack of combat effectiveness.
• Lack of firing from units. High casualties may become obvious by the lack of friendly units firing from a given location. For instance, if you have a squad on a hill that is being attacked, and over time you hear less and less firing coming from that hill even though the enemy is still in prolific numbers, it is reasonable to assume a state of combat ineffectiveness for that squad due to casualty levels.
• Lack of communication. If nobody in the element is talking, giving contact reports, orders, etc.
• Many casualties, including KIA as well as WIA that require aid. KIAs are always bad, but bear in mind that WIAs can actually do more harm to the short-term effectiveness of a unit, as they require personnel to stop fighting so that they can provide the wounded with medical aid and attention.
• Unit reduced to fractional strength. Any time an element becomes attrited to a small fraction of its original strength, a reasonable lack of combat effectiveness can be assumed. While this is not always true, it is a good rule-of-thumb to go by.
How to Deal with Combat Ineffectiveness
Once a combat ineffective state has been determined, it is up to the senior element leader to take actions to preserve the remaining strength of the element as well as place it into a position from which it can have a more significant influence on the course of the battle.
This is generally done by merging the remainder of an element into a parent or sister element, and thus augmenting or replacing casualties in said parent or sister element.
The senior element leader should follow these steps in dealing with combat ineffectiveness via merging with another element.
This is generally done by merging the remainder of an element into a parent or sister element, and thus augmenting or replacing casualties in said parent or sister element.
The senior element leader should follow these steps in dealing with combat ineffectiveness via merging with another element.
How to Merge With Another Element
• Determine which other friendly elements would be suitable to merge into. This question is typically posed to the next-senior level of leadership - for example, a squad leader would ask the Platoon Commander for direction, while a Fireteam Leader would ask his Squad Leader.
• Upon being told or deciding on which element to merge with, direct the players under your command to join the appropriate communication channel. Merging into the right comm channel is critical to reestablishing leadership and smooth communications.
• Report in to the new element leader and give them a quick status report on the forces that you have just joined to their element.
• Unless directed otherwise, attempt to move and link up with the new element at whatever position it currently holds. METT-TC factors are used to judge the suitability of such movements.
• Once a link-up has occurred, or when time allows, instruct players to use the ACE3 system to merge from their combat-ineffective elements into their new elements. Depending on the situation, the leader of the group(s) being merged into may decide to make these arrangements himself, in accordance with his plans for each team and the forces that you have brought him.
Those should be the most typical difficult leadership situations one will find themselves in. Being able to react to them appropriately and without hesitation always helps to minimize their negative effects on the platoon, and familiarity with the steps and situations involved becomes key for all leaders to know and be capable of executing on demand.
Leadership Development
The development of a leader is something that takes time. It is a process which must be cultivated by a positive group atmosphere and a willingness and desire on the part of junior leaders to play at a 'higher level'. In the 11th Marine Division we believe strongly that a player must earn their rank - from fireteam member (Private - Lance Corporal), to fireteam leader (Corporal), squad leader (Sergeant), platoon commander (Lieutenant) and other higher leadership positions (Captain - Major) - in order to effectively command those in subordinate roles. Too often we have seen examples elsewhere where a member who was not a proficient squad or fireteam leader was put into a platoon-commander-esque position and failed due to not being comfortable with how the lower leadership levels worked in the context of a large mission. We avoid that through our emphasis on leadership development from the ground up.
To help develop leaders, there are a few different methods that can be employed to gain experience, proficiency, and ultimately lead one down the path towards whatever leadership level they are interested in pursuing. Those methods are described below.
To help develop leaders, there are a few different methods that can be employed to gain experience, proficiency, and ultimately lead one down the path towards whatever leadership level they are interested in pursuing. Those methods are described below.
Learning by Observation
Learning by example is a great way to get experience as to how leadership is done in any group. For this, you simply need to play and pay attention to your leaders. Listen to how they give orders, how they make decisions, how they maneuver and fight using their unit, how they react to difficult circumstances, and so on. Taking notes helps as well, particularly if you want to transition into "Learning by Discussion" post-session.
Learning by observation is the easiest of all methods to use, and can be employed in every mission with just a bit of extra attention paid towards it.
Learning by observation is the easiest of all methods to use, and can be employed in every mission with just a bit of extra attention paid towards it.
Learning by Reading
Learning by reading comes in a variety of forms. Most groups, such as ours, will have "After Action Review" forums or topics in which players from a given mission or set of missions can share their experiences, videos, and screen compilations. These can provide a wealth of information for players wondering why a mission went a certain way. In addition to learning from past gaming experiences, you can also look for actual military publications on various topics - to include field manuals, tech manuals, or memoirs and similar. There is a wealth of material available to read and learn from - the only thing that's needed is time, and a desire for self-improvement.
Learning by reading is the easiest way to learn in a solo capacity outside of gaming sessions.
Learning by reading is the easiest way to learn in a solo capacity outside of gaming sessions.
Learning by Discussion
Learning by discussion is one of the most interactive ways to learn leadership values, and analyze past scenarios and what went right or wrong in them. Learning by discussion is done in a variety of fashions - through after-action reviews, through group leadership discussions, through soliciting feedback about your own leadership, or via the mentorship of another player.
Unlike Learning by Observation or Learning by Reading, Learning by Discussion is an active process that requires another participant to involve themselves in the learning process.
Unlike Learning by Observation or Learning by Reading, Learning by Discussion is an active process that requires another participant to involve themselves in the learning process.
The After-Action Review
The after-action review is a process by which players discuss a mission or series of missions post-session, in order to share their experiences and tell their side of the story, see how the mission(s) played out and why things happened the way they did, as well as distill lesson-learned and find ways to improve teamwork and gameplay in the future.
AARs are critical towards learning lessons as a group, as well as showing the variety of experiences that occur in each and every mission. Being able to see how the actions of a seemingly unrelated player impacted your experience in a mission is always rather interesting, and the lessons that can be learned from the group discussions that result can provide great material for players and leaders alike to learn from.
AARs are critical towards learning lessons as a group, as well as showing the variety of experiences that occur in each and every mission. Being able to see how the actions of a seemingly unrelated player impacted your experience in a mission is always rather interesting, and the lessons that can be learned from the group discussions that result can provide great material for players and leaders alike to learn from.
After Action Review Goals
• Tell fun and interesting "war stories". This is simply the act of telling what happened to you during the mission, what you saw, cool events, etc. "War stories" are conveyed through multiple media types:
• Written descriptions of the events as you saw them. You don't have to be Shakespeare to write a good AAR - just think of what happened, what was neat about it all, and tell your story as best you can.
• Screenshots taken during the mission from your point of view. Fraps/Steam work well for taking screenshots, while Picasa is great for creating galleries from them. Both are free, though Fraps requires a license to get the most out of the video feature of it. For screens, though, it's free and simple to use.
• Video footage filmed from your point of view during the session. This can be creatively put together in any number of cool combinations, and every video creator ends up developing his own style of how to convey the action through the editing of his videos.
• Identify what was supposed to happen in given missions. What was the original plan, as you understood it? What was your role supposed to be?
• Identify what actually ended up happening, what the difference between the expected and actual outcomes were, and attempt to figure out and explain why it happened the way it did, based on your observations. For example, was there a key event that seemed to make the battle shift course unexpectedly?
• Distill lessons-learned from all of the above points. The intent with lessons-learned is to discover ways to improve future teamplay and coordination, based on the experiences of the session. This is your chance to tell everyone what you learned from the mission personally, as well as what you think the group could learn from things collectively.
• Single out and praise those players who you felt did well. The idea here is to foster positive reinforcement and reward people for doing a good job in-game. Everyone benefits when praise and compliments are given in response to those things that help to make our playerbase such a great group of people to game with. A few kind words from a senior player make a great impression on a junior players and are worth their weight in gold.
Tips for an AAR
• For everything negative, say something positive. It's always important to stress the good things that happened, without shying away from talking about mistakes and times where things didn't go as well as desired. As long as a healthy balance is maintained, positive results will come from the discussion.
• Assume good faith. If someone says something that seems like it may be a bit harsh, take a step back and recognize that they're attempting to help, even if they may have worded things poorly. Give them the benefit of the doubt and things will generally go more smoothly. If you have a conflict, attempt to resolve it in a private one-on-one capacity first.
• Work to foster an atmosphere of mutual trust at all times. In our group, we are lucky to have a playerbase that is as open and honest with each other as we are about our accomplishments as well as mistakes. Continuing to encourage this honesty fosters an atmosphere of trust that further enhances the feedback cycle.
As you can see, the AAR process is a very important one for group evolution, esprit de corps, and more. It is important at all times for leaders and senior players to foster an atmosphere that encourages people to post their thoughts - both positive and negative - in order to maintain a healthy outlook on things. Posting just the positive is deceptive and useless - even the best missions have something that can be improved on. Likewise, being exclusively negative is useless as well - even when things go completely to hell, someone, and usually quite a few someone's, did the best they could and went down fighting. The proper balance is important to maintain.
To close this subsection out, here is a bit from a real-world after-action review by Marines fighting in Fallujah, Iraq, which talks about the after-action review process they used and encouraged during their time in combat.
To close this subsection out, here is a bit from a real-world after-action review by Marines fighting in Fallujah, Iraq, which talks about the after-action review process they used and encouraged during their time in combat.
"Constructive criticism should be encouraged. Every Marine debriefs each other, telling good and bad observations. The squad leader will also be critiqued by his Marines in an appropriate fashion. The criticism is not meant to undermine the squad leaders’ authority. It is to allow the squad leader to instruct the Marines on why he chose to run the squad the way he did. Young Marines will gain knowledge about squad tactics that they may never have figured out if the squad leader did not tell them. It will prepare them for leadership billets. It will also give them confidence in their squad leader because they will trust him and his knowledge."
Soliciting Feedback
When it comes to soliciting feedback on your own leadership, ensure that you remind the relevant people (subordinates, or leader) that you would like them to give you feedback after the current mission on how they did during it. This cues them to take their own notes so that they can be better equipped to discuss things with you post-session.
Tactical Decision Games
Tactical Decision Games (TDGs) are another interesting way to discuss leadership. In this, you have a leader give you a scenario description, and in a specific timeframe, you must come up with a plan, write the orders for the plan, and send them back to the leader. From that, a discussion can be made as to what the pros/cons of your orders might have been, how you could improve on things, et cetera. This can be an interesting way to get leadership insight in a one-on-one fashion without having to go in-game.
Mentorship
When you want to learn through mentorship, you simply find a player whose opinion you value and ask them about how they do things, what they think about when leading, any tips or tricks they may have, etc. If you've ran into issues with certain aspects of leadership - find out how they do the same things. If you saw them do something interesting in a mission, get into their head and see how their decision-making process worked in that instance. There is a lot you can learn from the other leaders - you just need to seek it out.
Learning by Doing
'Learning by doing' is the most intimidating of all methods of developing leadership abilities, at least when done with live players.
To help lessen the intimidation, players can 'wargame' in singleplayer, via practicing with AI teams (and the help of the "High Command" control interface). They can also solicit the help of other players in doing limited-playercount leadership training - for example, running a single fireteam, or a single squad, can help warm people up towards leadership in a less-intimidating fashion.
Leadership sessions (Officer Candidate School & NCO School) are also held from time to time, allowing the junior players to lead while more senior players play the roles of fireteam members, observing the leadership of the junior players and giving them constructive feedback at the end of each mission.
Finally, 'learning by doing' is facilitated by a group atmosphere that encourages juniors to step up and take command as soon as they feel ready for it, as well as help to cultivate them into someone who will feel ready and capable of leading his fellow players.
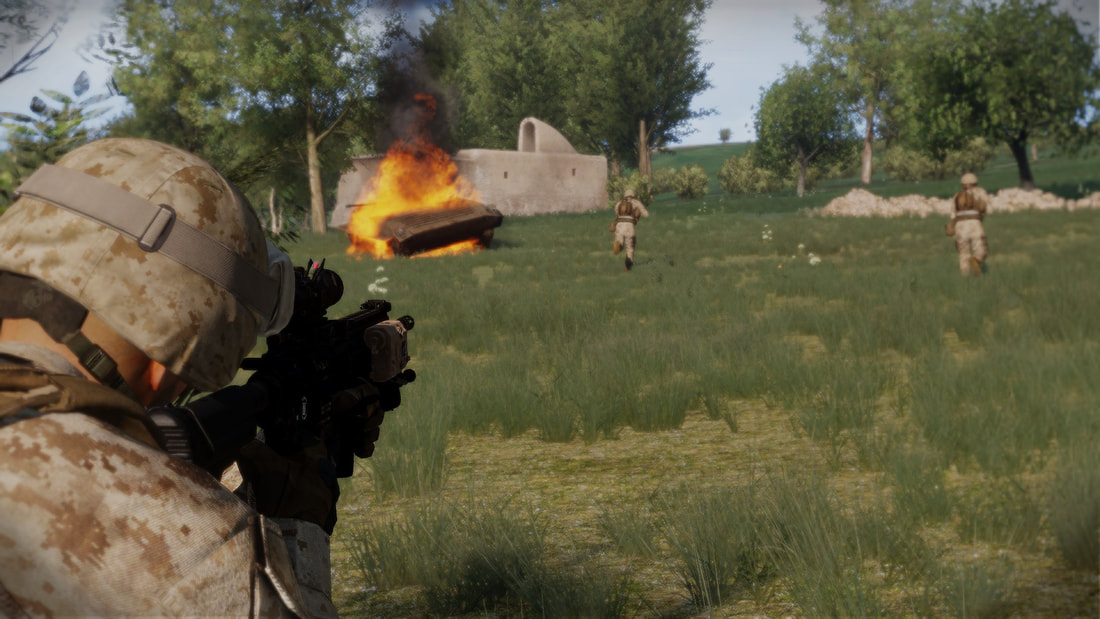
Practical Leadership in Gaming
The full range of leadership requirements found in our tactical guide can be daunting in sheer scope and depth. All of the information found here is important for anyone interested in leading. This relevance becomes the key element when it comes to being a leader in any gaming situation, whether coordinating 300 players in Arma, or a raid of 40 in any one of the MMORPG titles on the market. There are considerations that must be made as someone coordinating a group of gamers across the Internet, rather than simply as virtual soldiers in a simulated battlefield. You must treat yourself as a manager, human resources director, and event coordinator all in one package. You must also remember that the people you are working with are just that - people. Don't lose perspective on what you're doing simply because of the context. These are people who are looking to have a good time. Gaming is about entertainment, and your primary goal as a leader is to coordinate that entertainment and facilitate the enjoyment of all participants through a streamlined, well directed event.
The Volunteer
If there is one thing that you repeat to yourself, over and over again, while leading any group of people in a gaming environment is that they are volunteers. They are there to have fun, be rewarded for their participation, and gain a real sense of accomplishment through the game. This kind of volunteer participation is far smaller in scope and meaning than more traditional forms. There is little given to, and typically more taken away, from the experience. This means that bad experiences can lose volunteers quickly. It, then, is critical that you remember who you are leading within the game. These are people who expect you to help them have a good time, and there isn't much room for disappointment. If you consistently fail to meet the expectations of your players, they will choose a new leader or simply stop participating.
Note that our group does play "milsim". This is most often seen in the form of military roleplaying both inside and outside of the game. Milsim groups can often be abrasive for gamers who are not looking for a military simulation lifestyle, so we advise players to avoid groups they aren't interested in. We treat our players in a manner similar to actual military discipline, whilst retaining a fun and enjoying phase of gameplay.
Note that our group does play "milsim". This is most often seen in the form of military roleplaying both inside and outside of the game. Milsim groups can often be abrasive for gamers who are not looking for a military simulation lifestyle, so we advise players to avoid groups they aren't interested in. We treat our players in a manner similar to actual military discipline, whilst retaining a fun and enjoying phase of gameplay.
The Gamers You Lead
To lead most effectively, you must know who you are leading. The types of gamers found here apply primarily to Arma, but can also be closely linked to other game types as well. For the most part, you will be leading four kinds of gamers: the cooperative, the adversarial, the experience-seeker, and the milsim gamer. Each type has different quirks and attributes that you must understand and seek to fulfill as you lead them through their gaming experience.
The Cooperative Gamer
The cooperative gamer is a real team-player. These members are most interested in doing anything that involves heavy teamwork, coordination, and betterment through group effort. This is a relatively easy type of gamer to work with because they seek strong teamwork and coordination first, which is also your primary goal as a leader. Cooperative gamers can be very helpful in assisting you with the task of leadership. They make excellent junior leaders, enthusiastic participants, and are typically willing to go beyond standard participation for the good of the group. Keeping a cooperative gamer happy and active is just a matter of striving for strong teamwork, good organization, and effective communication. The suggested organization methods found here will address much of this for you.
Cooperative gamers become unhappy when teamwork breaks down, communication becomes ineffective or misunderstood, or "lone-wolf" players take advantage of the whole for their own gain. Keep your organization strong and your lone-wolf players to a minimum, and cooperative gamers will be very pleased with you.
Cooperative gamers become unhappy when teamwork breaks down, communication becomes ineffective or misunderstood, or "lone-wolf" players take advantage of the whole for their own gain. Keep your organization strong and your lone-wolf players to a minimum, and cooperative gamers will be very pleased with you.
The Adversarial Gamer
You might expect that the adversarial gamer is the opposite of cooperative, eschewing team participation and spending most of their time being the lone-wolf that cooperative players loathe. This, however, is not always accurate. The adversarial gamer is typically driven by in-game goals and achievements, preferring to demonstrate their prowess to other members as a form of self-worth. Accomplishments for adversarial gamers are not found simply within group participation, but come from concrete metrics such as score, mission accomplishment, or degree of success. Because demonstrating skill and accomplishment are so important to adversarial gamers, they often want to test their skill against other players. You will often find members like this in competition with one another for score, kill count, mission success, or other measurable criteria.
Keeping the adversarial gamer happy is a matter of allowing them to flex their competitive muscles. Make sure they feel that they are able to participate in a direct and effective way. Allow these players to take the combat heavy or other front line roles to get a strong sense of efficacy in-game. Cooperative players will often happily occupy support roles for adversarial gamers, allowing them to get into the fight. In this way, the two groups compliment one another nicely.
Adversarial gamers begin to become unhappy with situations where they feel that their personal skills are being wasted, or that they are being "cheated" of legitimate results. Try to avoid long dry spells in action content, as the longer these go, the more frustrated adversarial gamers become. From the Arma standpoint, remember that a series of lighter action missions may require that you follow with something much heavier and more direct to capture the interest of your adversarial gamers once again.
The Experience-Seeker
The experience-seekers are often the easiest of your members to please. These players are typically involved to get a sense of "being there". They want to be a part of the spectacle of a platoon charging into a town, or calling in air strikes. These players will often drift from cooperative to adversarial in their current interest, but the experience is always what drives them to participate.
An experience-seeker just wants to have an engrossing time. This means that it's often a good idea to give them something in-depth to do. Being in charge of support assets like artillery or air support does a great job of keeping experience-seekers interested. They get to make the fancy visual fireworks, after all. This not only makes a great scene, but allows them to indulge either their cooperative or adversarial leaning, whatever it may be at the time.
Typically, an experience-seeker will be happy so long as you avoid simple scenarios. Don't play missions oriented toward death matches, or other more "sports-like" activities, and they will be glad to be a part of the group.
The Milsim Gamer
Milsim gamers are players who enjoy a military simulation playstyle on Arma 3. Our group renders these players due to their liking of milsim. They are looking for a purpose and to play in a disciplined environment. These players will often take any role available in their current interest.
A milsim gamer wants to enjoy a military based style of play. This means that it's often a good idea to give them a challenge and it's also a good idea to put them in a realistic environment as close as possible.
A milsim gamer will be satisfied as long as your group is that of a military simulation and pertains to realism. Milsim gamers are rare in public gaming environments but will be common in almost any realism based group. These players are most common within our group.
The Lone-Wolf
Though not technically one of the four main groups of players, you must pay special attention to the lone-wolf players. Any game that involves leadership of large groups inherently calls for team play. Lone-wolf players avoid team play to go it their own way, doing what they please and indulging whatever sense of accomplishment they are looking for. Lone-wolf players are indicative of a few things: group health, member efficacy, and organization. Specifically, the appearance of lone-wolf players means there is a problem in one, or many, of those areas.
Dissatisfied members are likely to become lone-wolf players, no matter which major group they are typically a part of. If the player stops getting what they are looking for as part of their involvement, they may decide to get that fulfillment themselves by going it alone. This will inevitably anger other members who are still working for the team. It's important to address lone-wolf players quickly and effectively. Either figure out what needs to be done to get them back into team participation, or determine that they have simply reached the end of their participation and remove them. Strong communication and established relationships with your members will help you address lone-wolves quickly and effectively.
Dissatisfied members are likely to become lone-wolf players, no matter which major group they are typically a part of. If the player stops getting what they are looking for as part of their involvement, they may decide to get that fulfillment themselves by going it alone. This will inevitably anger other members who are still working for the team. It's important to address lone-wolf players quickly and effectively. Either figure out what needs to be done to get them back into team participation, or determine that they have simply reached the end of their participation and remove them. Strong communication and established relationships with your members will help you address lone-wolves quickly and effectively.
Considerations for Leadership
With an understanding of the type of players you will be leading, you must constantly keep their interests in mind as you conduct your leadership. This goes beyond simply what you are doing from a moment to moment adjustment in a mission. This begins with mission selection. You should keep your mission choices varied and planned in a way that keeps all of your members happy. Large scale, combined arms cooperative missions will certainly please your cooperative and experience-seekers, but your adversarial members might feel that their goals are diminished with the scale.
Break this up for your adversarial members by including well-designed competitive missions with a strong theme. Cooperative members will appreciate the teamwork and coordination, adversarial members will enjoy the competition with other players and the sense of accomplishment, and experience-seekers will enjoy the theme and participation. Keep your mission variety high, and always listen to your members. Know what they are interested in doing to ensure that you pick the right mission at the right time.
In-game, call for members who suit a particular task. If you need someone to bring up support assets at some point, call a known cooperative member by name and ask them to do it. They will feel involved, appreciated, and effective. By the same token, if a special task calls for someone strongly combat-oriented, ask one of your adversarial gamers to take the job. They will get the same sense of accomplishment.
Know Your Community
Obviously, you cannot make the right decision at the right time if you don't know your members. It is critically important that you interact with your members on a regular basis. Get to know who they are and what kind of play they enjoy. This will help you better understand them, communicate more effectively with them, and help them have a far better time. Do not fall prey to the ivory tower mentality. A good leader participates with his community and enjoys the people he games with. If you don't like who you lead, you need to go elsewhere. You will only serve to upset yourself and diminish the enjoyment of your entire community.
Remember that your members are volunteers who have something they want to get from their participation. If you're not running a military simulation group then unnecessary military discipline and harsh treatment will alienate your members - not encourage them. Treat your members as people, with genuine consideration for what they want, who they are, and how they feel. Always be considerate, even-handed, and fair. Apply community rules equally, work with your community, and do what your job calls for you to do: make your community a great place to game, and a place where everyone can have a great time doing what they enjoy the most.
Remember that your members are volunteers who have something they want to get from their participation. If you're not running a military simulation group then unnecessary military discipline and harsh treatment will alienate your members - not encourage them. Treat your members as people, with genuine consideration for what they want, who they are, and how they feel. Always be considerate, even-handed, and fair. Apply community rules equally, work with your community, and do what your job calls for you to do: make your community a great place to game, and a place where everyone can have a great time doing what they enjoy the most.
