Structure
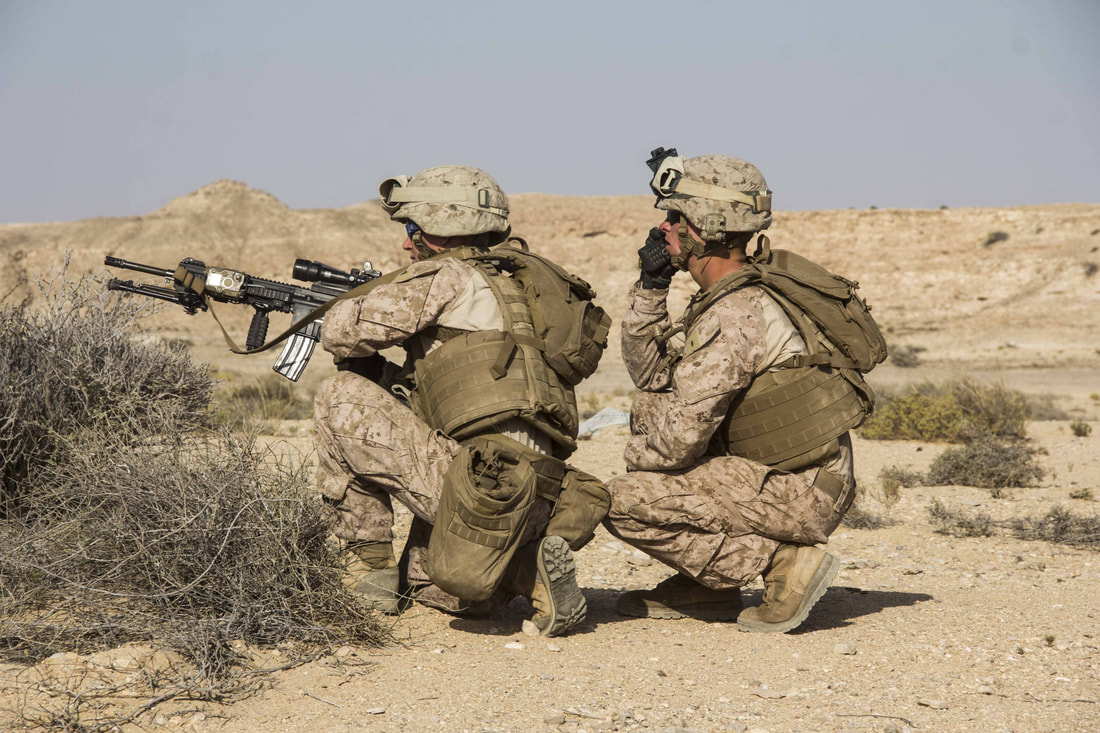
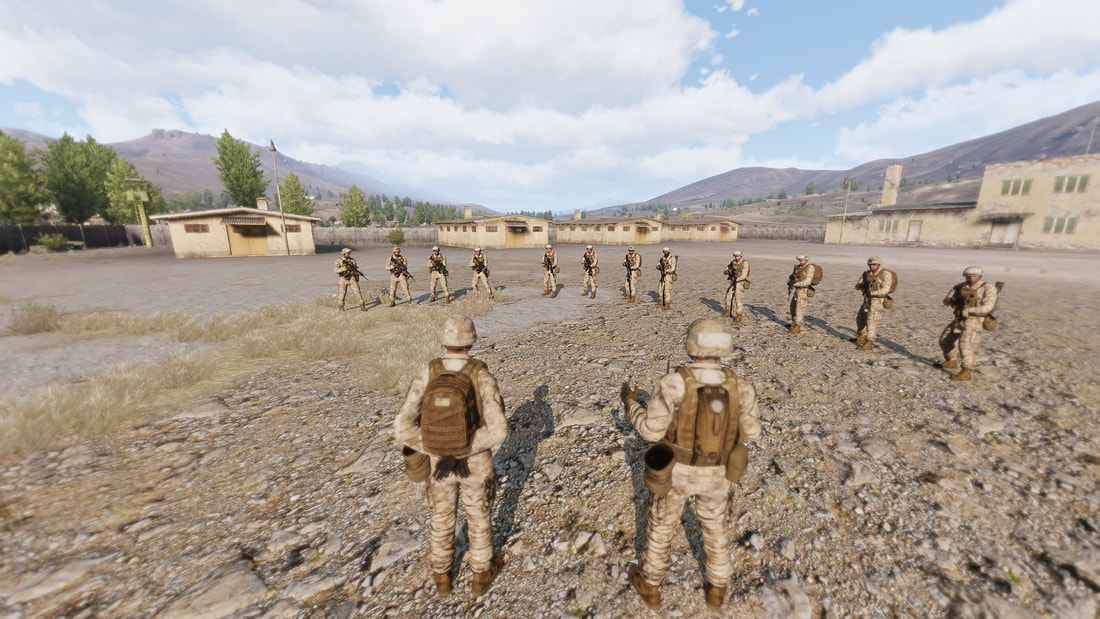
The 11th Marine Division typically operates at Company level on missions - meaning, multiple platoons and various attached assets, typically in the 100 to 300 member strength overall. However, the core of the group is the infantry platoon - and as such, we will talk about that unit primarily, then expound on the full Company structure later on.
The key point of our platoon structure is that, for the purposes of command and control, as well as the development of standardized team-level tactics, it is necessary to have a group structured in a fairly standardized way that all players (and particularly the leaders) can be familiar with and know how to be a part of, and our platoon structure accomplishes this goal.
The key point of our platoon structure is that, for the purposes of command and control, as well as the development of standardized team-level tactics, it is necessary to have a group structured in a fairly standardized way that all players (and particularly the leaders) can be familiar with and know how to be a part of, and our platoon structure accomplishes this goal.
Succession of Command
The succession of command in a platoon is clearly established, allowing every member to know precisely what circumstances would result in them taking command of their element. In a squad, seniority comes from the order of the fireteams. First is senior, second is next in line, and third is last. In a fireteam, the fireteam leader is senior, followed by the automatic rifleman, the assistant automatic rifleman, and finally the rifleman.
In the overall scheme of things, seniority is as follow:
1.
Company Commander, then Company Executive Officer ("XO")
2.
Platoon Commanders (in the order of first, second, third), then Platoon Sergeant
3.
Alpha, Bravo, Charlie Squad Leader
4.
Alpha, Bravo, Charlie senior Fireteam Leaders
5.
Senior Remaining Fireteam Leader or Member
Note that in the unlikely event that the Company Commander, Company XO, Platoon Commander, Platoon Sergeant, squad leaders, and first-fireteam leaders are all dead, the senior remaining member of the platoon takes command of the remainder. At this point you probably have bigger problems than worrying about who specifically needs to be leading the handful of survivors.
The Fireteam
Fireteam Organization & Purpose
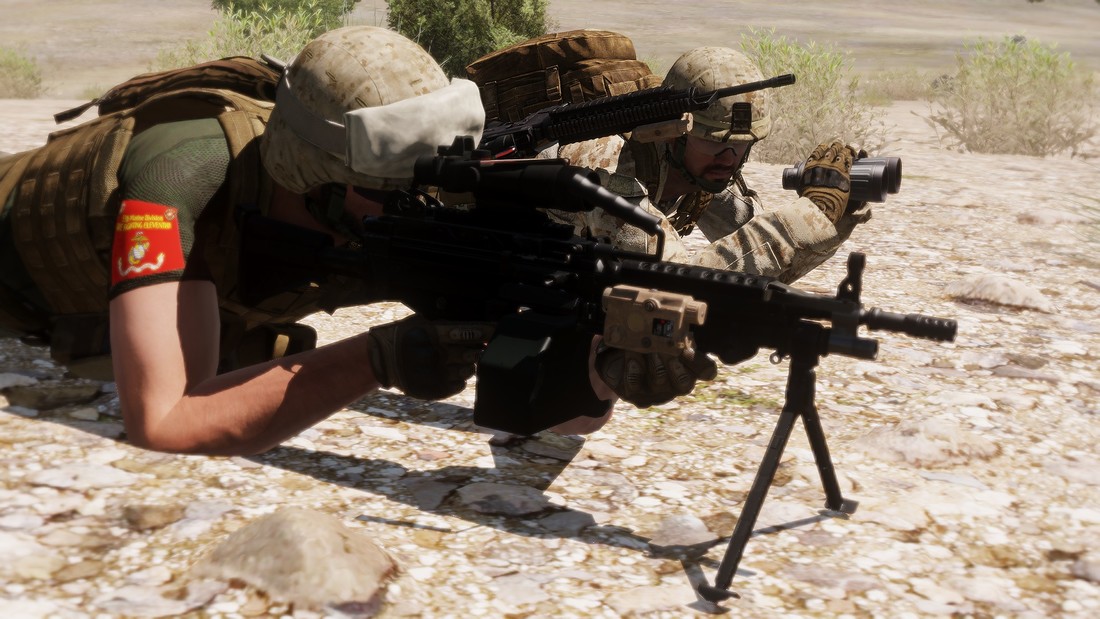
In our organizational structure, the fireteam is the smallest combat element employed at the platoon level. Three fireteams, a combat lifesaver (corpsman / medic) and a squad leader element make up one squad, resulting in 14 people in total. Three squads and a platoon headquarters element make up the platoon. There are six fireteams per platoon, not counting the squad leader and platoon headquarters elements.
Fireteams are lead by members at the rank of Corporal. The fireteam leader is the first major step in the leadership development of a player, and everyone is encouraged to try their hand at this leadership role if they receive the opportunity.
Each fireteam carries a well-rounded assortment of firepower. Generally, this consists of one-four standard rifles, one rifle with grenade launcher, and one automatic rifle or light machinegun. This gives the fireteam an indirect-fire capability (grenade launcher), a sustained-fire capability (automatic rifle or light machinegun), and volume in point-fire (Rifle).
Fireteam Member Roles
In addition to the responsibilities of a fireteam member outlined in the initial "Basic Rifleman" section, each fireteam member will have additional responsibilities based upon their role in the team.
In addition to the responsibilities of a fireteam member outlined in the initial "Basic Rifleman" section, each fireteam member will have additional responsibilities based upon their role in the team.
The following are the fireteam members, along with their seniority and roles:
Fireteam Leader ("FTL")
• Senior team member
• Leads the fireteam
• Carries a rifle with attached grenade launcher
• Leads the first buddy team, consisting of himself and the rifleman
• Senior team member
• Leads the fireteam
• Carries a rifle with attached grenade launcher
• Leads the first buddy team, consisting of himself and the rifleman
Automatic Rifleman ("AR")
• Second in command of the team
• Carries and employs the automatic rifle or light machinegun
• Leads the second buddy team, consisting of himself and the assistant automatic rifleman
• Second in command of the team
• Carries and employs the automatic rifle or light machinegun
• Leads the second buddy team, consisting of himself and the assistant automatic rifleman
Assistant Automatic Rifleman ("AAR")
• Third in command of the team
• Carries extra ammo for the automatic rifleman
• Armed with a rifle
• Follows and supports the automatic rifleman as his combat buddy
• Third in command of the team
• Carries extra ammo for the automatic rifleman
• Armed with a rifle
• Follows and supports the automatic rifleman as his combat buddy
Rifleman ("R")
• Junior member of the team
• Armed with a rifle
• Generally has one or two light anti-tank weapons
• Can be refitted to fulfill other necessary roles
• Junior member of the team
• Armed with a rifle
• Generally has one or two light anti-tank weapons
• Can be refitted to fulfill other necessary roles
The Fireteam Leader ("FTL")
The Fireteam Leader's mantra is "Follow me and do as I do". They are the most combat-oriented leader position on the battlefield, and leads their fireteam from the front while acting as the example that his team members will follow.
Fireteam Leaders...
• Get their orders from their squad leader. This may include aspects like the formation required, special rules of engagement, sectors of responsibility, order of movement, and so forth.
• Are tactically proficient and capable of exercising good initiative and sound judgment. Micromanagement of fireteam leaders should not be required. Once given a task, a FTL should be capable of understanding the intent of the order, and executing it with competence. A FTL should be capable and competent at using their fireteam members to carry out any order given by the squad leader.
• Work towards accomplishing the squad mission while attempting to minimize loss of life in their fireteam. They know that mission accomplishment takes priority over "troop welfare". Ideally, the fireteam leader accomplishes that mission without losing any of their fireteam members. With that being said, they do not shy away from dangerous assignments, and are ready to put their fireteam in a difficult situation when there is no better course of action, it contributes significantly towards mission accomplishment, or when ordered by their squad leader.
• Augment the squad leader's situational awareness by reporting significant observations. A fireteam leader has a perspective that is generally slightly forward of the squad leader, even if only by a dozen meters. Because of this, it is important that they succinctly and accurately report significant observations back to their squad leader. This includes enemy contacts, terrain considerations, and anything else that may be tactically significant.
• Talk to their teams and keep them informed. They are clear and concise when speaking, and ensure that their team members know everything relevant to the successful fulfillment of their mission.
• Ensure that their fireteam members maintain good interval and situational awareness. This is accomplished in part by giving simple formations (typically line, wedge, or staggered column) and emphasizing proper sector coverage and security. The FTL must be vigilant and proactive in preventing their team members from becoming target fixated or bunched up.
• Control and direct the team's fire. While the fireteam leader can often let his team members engage at will, there will come times when the careful direction of their fire will be critical to success. Engagement of high-priority targets such as snipers, machineguns, and vehicles are examples of when the fireteam leader will need to control and direct the team's fire.
• Maintain disciplined initiative and momentum. When the squad commits to a fight, the fireteam leaders are at the cutting edge of the battle. It is often up to them to use initiative based on what they see, and maintain momentum and combat action in accordance with the stated intent of the squad leader or platoon commander. When in doubt, they request additional guidance from the squad leader.
• Assign and utilize buddy teams. By having a standard split to work with, each fireteam leader is able to more rapidly and effectively order their subordinates.
• Designate point men as required. Having a single man on point can work quite well in many situations. In other situations using an entire fireteam is more ideal. This is a judgment call that needs to be made by the fireteam leader or squad leader, dicated by the situation.
• Maintain accountability of their team members. It is up to the fireteam leader to ensure that no team members are left behind. An FTL should do a team check after every engagement, and multiple times during extended fights. Having a team member go down without the FTL knowing about it can be a major issue and must be avoided.
• Ensure that machinegun and anti-tank assets are retained in the event of team member casualties. If the fireteam's AR goes down, it's up to the team leader to ensure that the assistant recovers the machinegun. The same is true if the fireteam has any anti-tank capability.
• Are proficient with their underbarrel grenade launchers ("UGL"). See the following section for more.
Fireteam Leader UGL Employment
The fireteam leader must be able to use their UGL to carry out a number of tasks, such as firing high-explosive shells at significant enemy positions, screening friendly movement, marking or masking the enemy with smoke shells, or using illumination shells in low light conditions. More esoteric grenade types, such as buckshot or teargas, can also be found from time to time. A team leader is expected to spend time familiarizing themselves with and becoming skilled at the usage of the grenade launcher.
The fireteam leader must be able to use their UGL to carry out a number of tasks, such as firing high-explosive shells at significant enemy positions, screening friendly movement, marking or masking the enemy with smoke shells, or using illumination shells in low light conditions. More esoteric grenade types, such as buckshot or teargas, can also be found from time to time. A team leader is expected to spend time familiarizing themselves with and becoming skilled at the usage of the grenade launcher.
• A typical UGL grenade requires up to 35 meters of travel distance before it will arm. If you land a UGL shot within this distance, the grenade will be a dud. This can come into significance when engaging in MOUT combat, so keep it in mind.
• When employing high explosive grenades, a grenadier should focus on high-value targets (e.g. crew-served machineguns, snipers, etc) or clusters of the enemy. Due to the limited supply of grenades an FTL typically has, it is important to reserve and employ them to inflict maximum damage. Let your team members deal with what they can with their AR and rifles, and employ your UGL grenades to supplement them and cover any gaps in their fires.
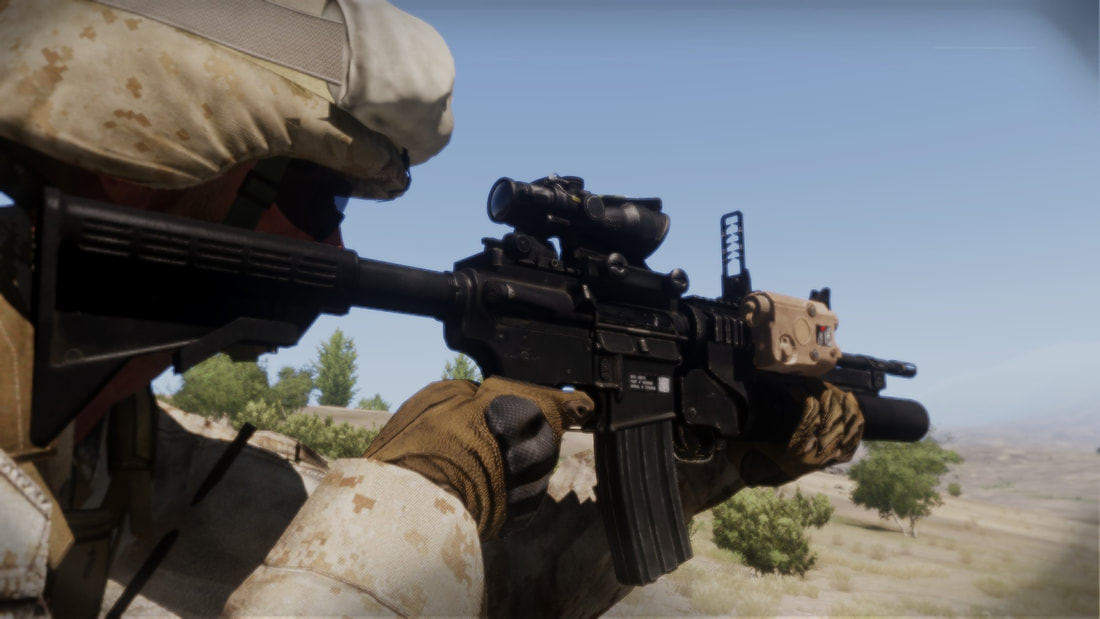
• Ensure that you are able to estimate range properly, and also are aware of what range you are most effective at with your grenades. First-round accuracy is important - using rounds to "feel out" the range is to be avoided as it wastes precious ammo. An M4/M16 rifle with the M203 launcher has a sight that can be set to 50, 100, 150, 200 or 250 meters of range. Once set, the sight will correspond to that impact distance, as seen in the below illustrations.
• When employing high explosive grenades, a grenadier should focus on high-value targets (e.g. crew-served machineguns, snipers, etc) or clusters of the enemy. Due to the limited supply of grenades an FTL typically has, it is important to reserve and employ them to inflict maximum damage. Let your team members deal with what they can with their AR and rifles, and employ your UGL grenades to supplement them and cover any gaps in their fires.
• Ensure that you are able to estimate range properly, and also are aware of what range you are most effective at with your grenades. First-round accuracy is important - using rounds to "feel out" the range is to be avoided as it wastes precious ammo. An M4/M16 rifle with the M203 launcher has a sight that can be set to 50, 100, 150, 200 or 250 meters of range. Once set, the sight will correspond to that impact distance, as seen in the below illustrations.
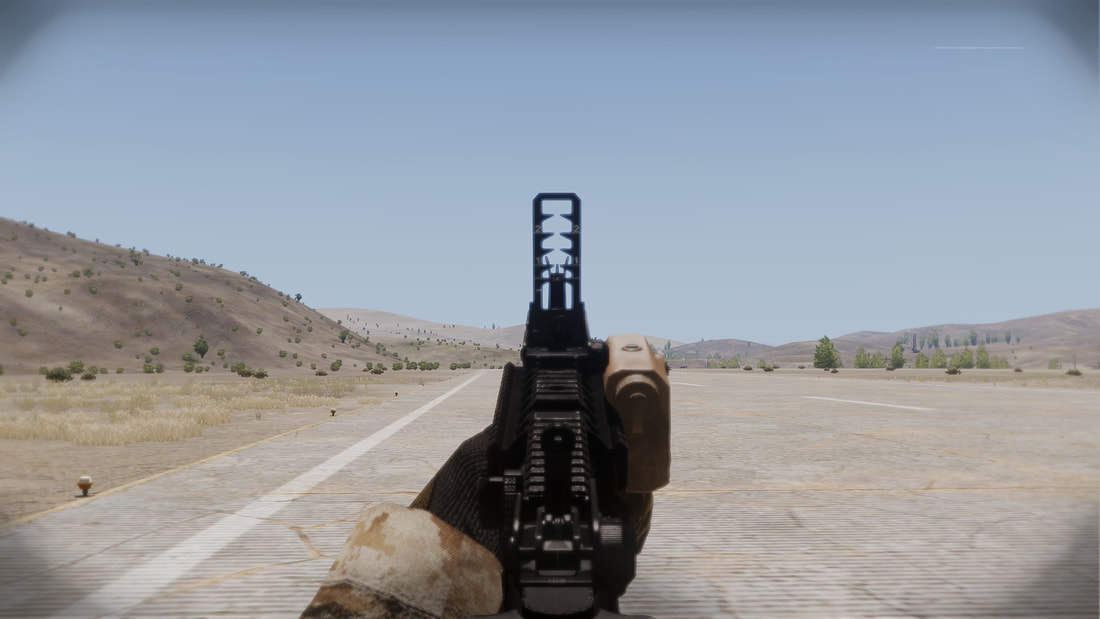
Sight at 100m
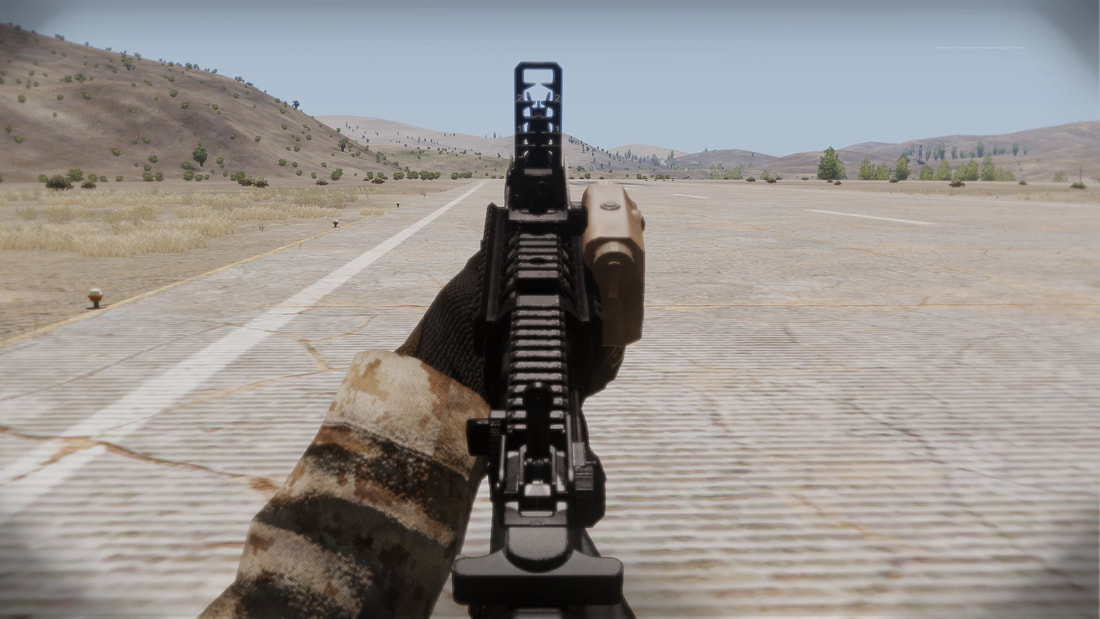
Sight at 200m
|
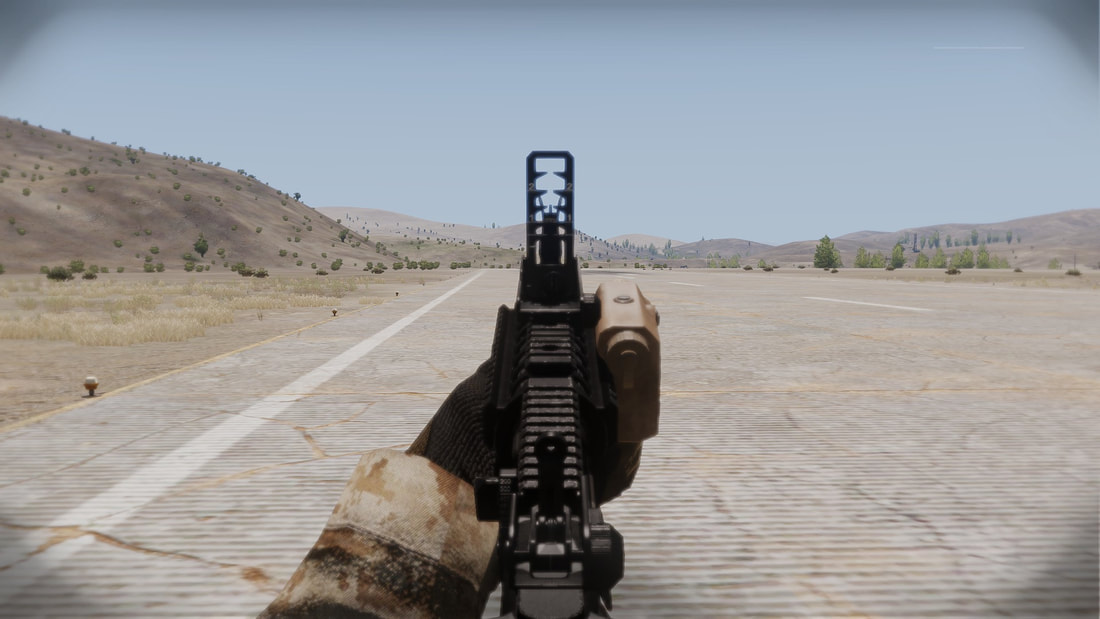
Sight at 150m
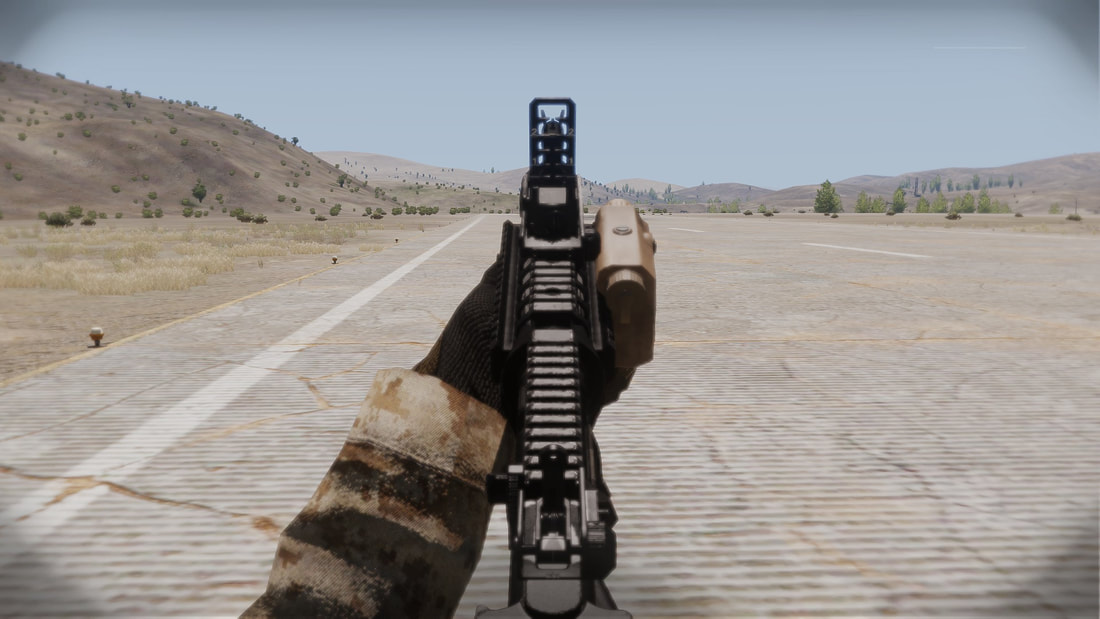
Sight at 250m
|
• Grenades can be used to put fire into dead zones (areas that a defense cannot hit with direct-fire, such as depressions in the terrain) and otherwise provide basic, light indirect fire support. This is generally imprecise and should be reserved for when the grenadier has a good idea of where the enemy is, how they need to fire to hit them, if the probability of a kill is unusually high, or if it is important to harass the enemy and attempt to disrupt their attack. Alternatively, if the grenadier has an excess of grenades, or a crate full of them, indirect fire can be a useful option.
• Illumination can be used to great effect at night via aerial flares. When firing flares, avoid firing them behind the enemy, especially in wooded terrain. This causes the flare light to silhouette them while leaving you and your team clearly illuminated. It is better to either fire the flare between you and the enemy or off to one side of them. Star shells are a variation of flares that are short-lived and provide less illumination. They are primarily used for signaling, though they can work for illumination in a pinch.
• Illumination can be used to great effect at night via aerial flares. When firing flares, avoid firing them behind the enemy, especially in wooded terrain. This causes the flare light to silhouette them while leaving you and your team clearly illuminated. It is better to either fire the flare between you and the enemy or off to one side of them. Star shells are a variation of flares that are short-lived and provide less illumination. They are primarily used for signaling, though they can work for illumination in a pinch.

• UGL smoke grenades can be used to great effect for a variety of tasks. These can include marking targets or friendly positions for close air support assets, obscuring the enemy's line of sight, masking friendly movement, and marking landing zones for helicopters. Individual initiative and good judgment is the key to being successful and timely with smoke grenades. When employing smoke, pay attention to which way the wind is blowing, and aim your smoke grenades such that the wind blows the smoke in a useful direction.
• Pay attention to what grenade you have loaded, or are loading into the launcher. The currently loaded grenade type will be indicated in the upper-right in the weapon info section of the HUD. You can change grenade types with your action menu in the event that you need to swap to a different type without firing. When reloading, try to get in the habit of reloading from the action menu or look at the HUD info before each shot. This prevents you from accidentally loading the wrong type of round once you have exhausted the previous type's supply.
• Pay attention to what grenade you have loaded, or are loading into the launcher. The currently loaded grenade type will be indicated in the upper-right in the weapon info section of the HUD. You can change grenade types with your action menu in the event that you need to swap to a different type without firing. When reloading, try to get in the habit of reloading from the action menu or look at the HUD info before each shot. This prevents you from accidentally loading the wrong type of round once you have exhausted the previous type's supply.
Automatic Rifleman ("AR")
The automatic rifleman is the fireteam's heavy firepower. They carry an M249 by default, giving them the ability to throw hundreds of rounds downrange in short order
The AR is second in command of the fireteam. In the event that the team leader becomes a casualty, the AR immediately takes charge of the fireteam and communicates their new role to the squad leader.
The AR is responsible for employing their weapon in a manner that maximizes the killing and suppressive power of it, allowing their teammates to maneuver with the support of their fire.
The AR is responsible for employing their weapon in a manner that maximizes the killing and suppressive power of it, allowing their teammates to maneuver with the support of their fire.
Automatic Riflemen...
• Control their fire. Short bursts tend to be the best way to employ a machinegun. The general guideline is to fire in six to eight round bursts, pausing between bursts to observe the effects of your fire, assess, and then reengage as necessary. With that being said, bear in mind that as contacts appear closer to the team, longer bursts can be used due to the greater chances of hitting closer targets.
• Stay aware of their ammunition state. This takes two forms: One, know how many rounds are left in your current belt or box - make sure not to get caught with only a few left when contact is made - and two, stay aware of your overall ammo count. You must ensure that you're carrying as much ammo as feasible, and as you free up space for more ammo, your assistant should be ready to pass you fresh belts or boxes.
• Take initiative on contact & achieve fire superiority. Upon receiving enemy fire, each AR knows that it is their responsibility to return as heavy of a volume of fire as possible, with the intent of achieving fire superiority over the attacking forces. The amount of return fire given by each AR is a decisive factor in the ability of his fireteam members to maneuver to advantageous positions, or towards cover or concealment as required.
• Are comfortable with being employed in the base of fire element. ARs must be familiar with the concept of acting as part of a 'base of fire' element. This includes being proficient at long-range fire, knowing how to shift fire to account for friendly forces reaching and moving through the objective area, and how to fire controlled, sustained, and effective suppression.
• Maintain appropriate positioning. When the fireteam leader does not explicitly dictate otherwise, it's up to the automatic rifleman to maintain a position in the formation appropriate to the terrain, enemy, et cetera. He must constantly be aware of possible firing positions from which he can best employ his AR, and be able to move to them and begin engaging the enemy at a moment's notice.
Assistant Automatic Rifleman ("AAR")
The assistant automatic rifleman, or "AAR", is the right-hand man of the automatic rifleman. They help spread-load the ammunition duties with the AR by carrying additional ammunition for that weapon.
The AAR's role is to stick with the AR and provide support - the two always form a buddy team. The AAR supports the AR in the form of providing security, helping to spot, engage, and adjust fire on targets.
If the automatic rifleman is killed, the assistant will take control of the weapon and become the fireteam's new automatic rifleman. In the event that both the AR and FTL become casualties, the AAR will take control of the team's riflemen and assess the situation. If possible, the AAR will maintain the remaining four members as a distinct fireteam - if unable, such as due to high casualties or confusion, the crippled fireteam may merge with another.
Assistant Automatic Riflemen...
• Look out for their automatic rifleman combat buddy. Your role is to protect the AR and help to augment their effectiveness. Do whatever you can to help keep them in the fight. Be especially alert for any enemies attempting to flank them. While the entire fireteam should be concerned with flank security, the AAR should be even more active in scanning for such threats. The AR is a devastating unit when employed properly, with the enemy will recognize and attempt to eliminate.
• Scan for, spot, and call out targets for the AR. Particularly while the AR is engaging, it's up to the assistant to search for, spot, and communicate the positions of any priority targets.
• Are proactive in ammo distribution. Don't wait until the AR asks for a reload, instead be ready to supply a new box of ammo during lulls in combat. Always ensure that the AR is loaded and good to go.
• Assist in making fire adjustments. The assistant can often see the results of the AR's fire more clearly than the AR can. If need be, the assistant should be ready to call out fire adjustments to help the AR work their rounds onto target. For instance - "bring it up, you're hitting low", "more left", etc.
• Never drop the extra automatic rifleman ammo you're carrying because it's "heavy". The AAR's role is in large part to bring along extra ammunition for their automatic rifleman buddy.
• Maintain appropriate positioning. The assistant should generally be within shouting distance of the automatic rifleman, and oftentimes much closer.
Rifleman ("R")
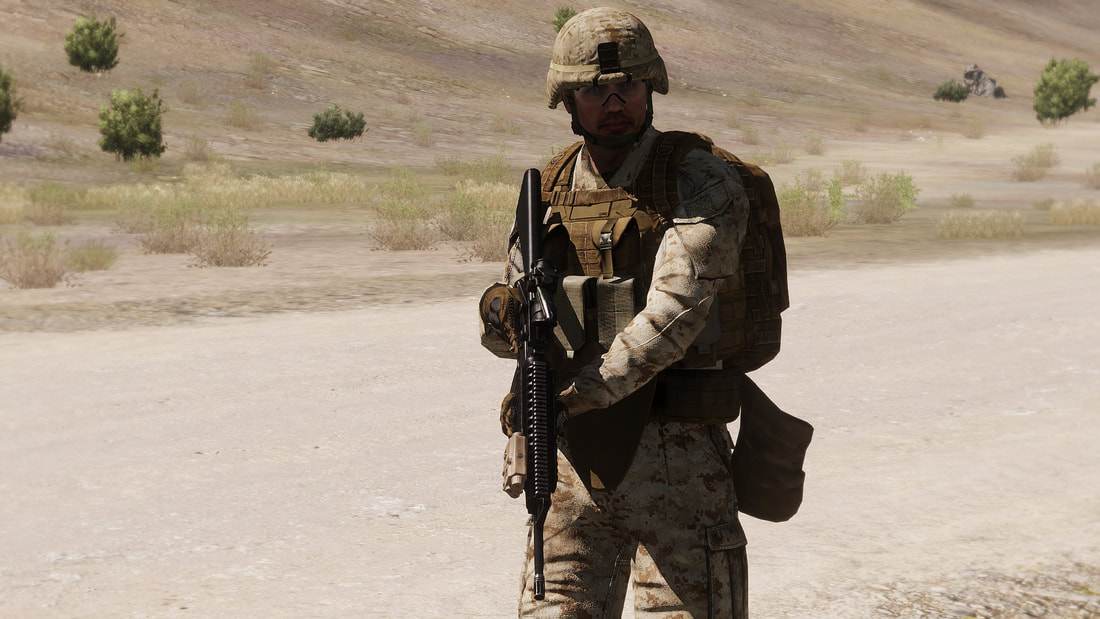
Every member of the group is a rifleman first and foremost. In a fireteam, the rifleman is typically the lowest ranking or newest member of the team. The Rifleman generally fulfills his standardized role but may be refitted by his team leader to fulfill a different role should the need arise. This role is the most adversable for both experienced veterans and new members that follow into action..
Riflemen...
• Stick with their buddy teammate(s). This fundamental low-level teamwork is an essential part of the fireteam, and by association, the squad's effectiveness.
• Scan for, spot, and call out targets. Always be alert, always be scanning, and provide security when halted.
• Maintain appropriate positioning. The rifleman should generally be within shouting distance of their assigned buddy teammates, and oftentimes much closer.
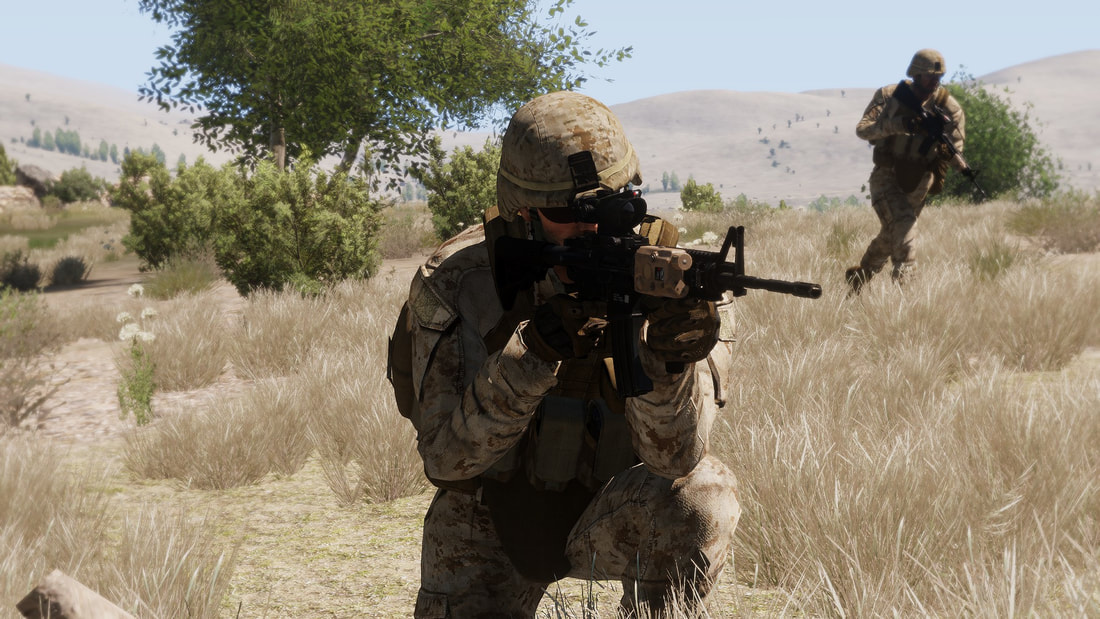
• Provide accurate rifle fire. Marksmanship is key for riflemen, they typically employ a skillset that applies for longer distance engagements and should be a better marksman than the rest of the fireteam.
• Stick with their buddy teammate(s). This fundamental low-level teamwork is an essential part of the fireteam, and by association, the squad's effectiveness.
• Scan for, spot, and call out targets. Always be alert, always be scanning, and provide security when halted.
• Maintain appropriate positioning. The rifleman should generally be within shouting distance of their assigned buddy teammates, and oftentimes much closer.
• Provide accurate rifle fire. Marksmanship is key for riflemen, they typically employ a skillset that applies for longer distance engagements and should be a better marksman than the rest of the fireteam.
Alternate Fireteam Roles
Fireteam compositions can change to reflect the mission of the platoon in any given scenario. The most common alternate fireteam member role is that of the light anti-tank rifleman, which is described below.
Fireteam compositions can change to reflect the mission of the platoon in any given scenario. The most common alternate fireteam member role is that of the light anti-tank rifleman, which is described below.
Anti-Tank Rifleman, Light ("LAT")
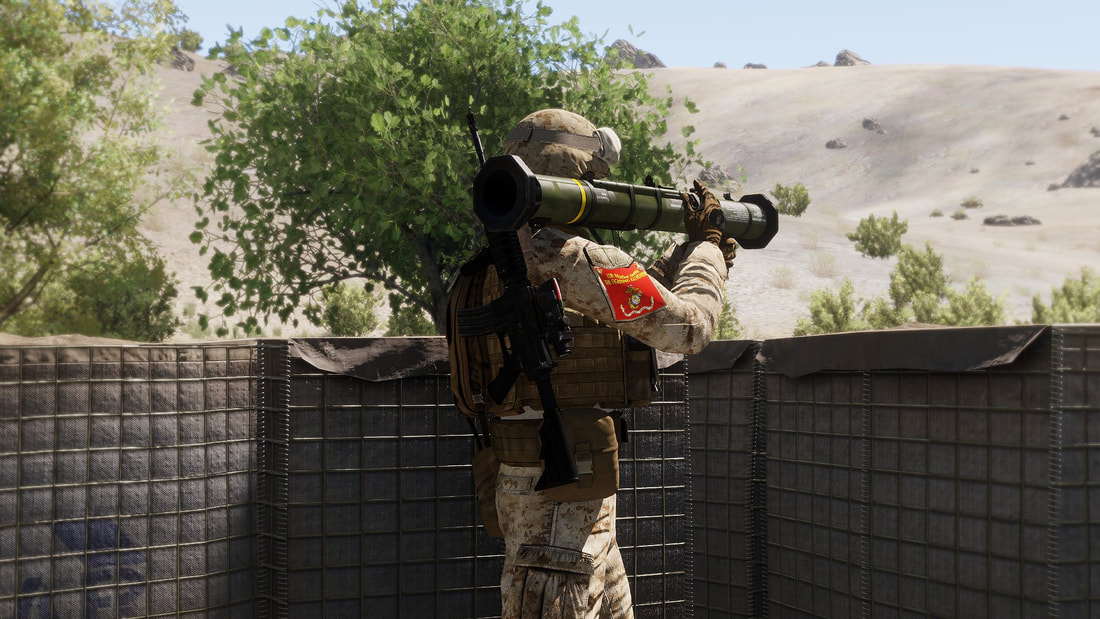
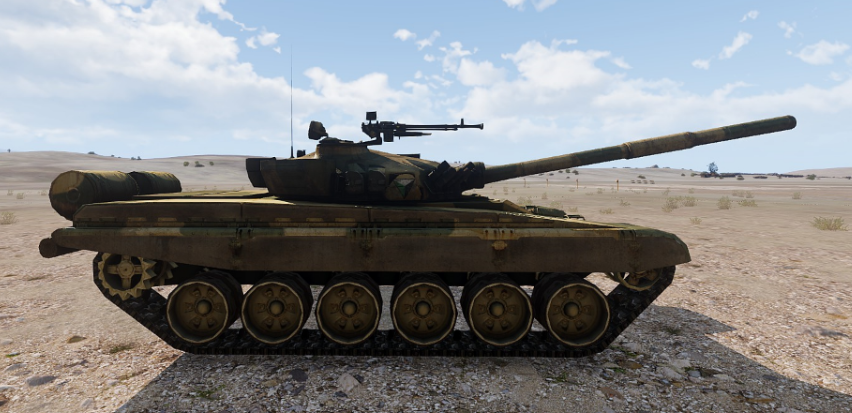
Fireteams will typically carry light anti-tank weaponry if enemy armor is expected to be present in an area. Generally, this will result in the team's rifleman being given a single-shot light anti-tank weapon like the AT-4 or M72 LAW. The anti-tank rifleman will carry out their normal rifleman duties, and in the event that enemy armor is encountered, they will immediately transition into anti-tank mode and attempt to take it out based upon their team and squad leader's directives.
As their name implies, light anti-tank launchers are an effective weapon for usage against light armor such as armored personnel carriers, while heavier armor such as that found on main battle tanks will require multiple impacts from LAT weaponry to defeat.
As their name implies, light anti-tank launchers are an effective weapon for usage against light armor such as armored personnel carriers, while heavier armor such as that found on main battle tanks will require multiple impacts from LAT weaponry to defeat.
Note that if the standard rifleman role is replaced by an anti-tank gunner in the fireteam, the AAR becomes the junior role, followed by the anti-tank gunner, the AR, and finally the FTL. This is to ensure that the junior team member does not have anti-tank responsibilities, as they can be rather significant roles in the missions that need them.
Anti-Tank Riflemen (Light)...
• Are proficient with their assigned anti-tank weapon and are able to engage enemy armor with confidence out to at least 300 meters. The more, the merrier - 300m is the bare minimum expected. To attain this proficiency, AT riflemen are expected to spend 'range time' engaging stationary and moving targets at various distances until they are confident in their first-shot abilities.
• Take only the shots they know they can hit. Due to it being a single-shot weapon, an AT rifleman cannot afford to miss their shot. When in doubt, if time and the tactical situation allow for it, don't hesitate to pass the AT off to a player who is more proficient if you feel that you cannot be successful with it - preferably before combat starts.
• Aim for the flanks, rear, or top of an armored vehicle. Armored vehicles tend to have their heaviest armor in the front, with the sides, rear, and top being thinner and more favorable places to hit them. Bear in mind that flank shots will have a chance to induce a "mobility kill" via 'tracking' (destroying the tank tracks) a tank. A tank that has been "mobility killed" is still a threat if the turret is still functional, so ensure that it is fully knocked out with an additional AT shot from another squad member.
• Take cover once they've fired their anti-tank weapon. Tank crews tend to react with anger towards being shot at by things that can actually harm them. If firing a hard-launch weapon, the backblast will kick up a dust signature that will allow a tank crew to spot you if you do not take cover or relocate.
• Know the capabilities and limitations of their weapon and utilize the principle of "volley firing" on targets when in doubt of a one-shot kill. Light anti-tank weapons have a tendency to not be terribly effective against medium and heavy armor. With this in mind, anti-tank personnel are expected to work towards using "volley firing" to engage difficult targets (either heavy armor or difficult shots). Volley firing is the act of having multiple anti-tank gunners ready to engage a target at the same time. This maximizes the chance to knock out a target - if one gunner misses, the other can adjust and fire a killing shot. Or, for heavy armor like tanks, multiple hits can be delivered in the span of seconds.
• Are familiar with the backblast danger presented by their weapon, and know how to clear it. Anti-tank weapons produce a hazardous backblast when they are fired - typically in the form of a cone extending 60-90° from the rear of the launch tube, and producing damage anywhere from 30-60 meters behind the launcher. The backblast of most anti-tank weapons has the capacity to kill or seriously wound those who are in the danger area, though it falls off over distance significantly. Some weapons are designed to have "soft-launch" capabilities that reduce or remove the backblast hazard, but you're unlikely to find light anti-tank weapons with such a feature.
Where to Aim...
As a general rule, armored vehicles have their strongest armor in the front and on the turret, with weaker armor on the sides, and the weakest armor on the top, bottom, and rear of the vehicle. For this reason, it's important to avoid taking shots - particularly with light anti-tank assets like the AT-4 - on the heavy armored parts of vehicles. Taking flank or rear shots is the best course of action, and occasionally you will even find yourself in a position where top or bottom shots become possible.
As a general rule, armored vehicles have their strongest armor in the front and on the turret, with weaker armor on the sides, and the weakest armor on the top, bottom, and rear of the vehicle. For this reason, it's important to avoid taking shots - particularly with light anti-tank assets like the AT-4 - on the heavy armored parts of vehicles. Taking flank or rear shots is the best course of action, and occasionally you will even find yourself in a position where top or bottom shots become possible.
Good Anti-Tank Shots
Side

Rear
Bad Anti-Tank Shots
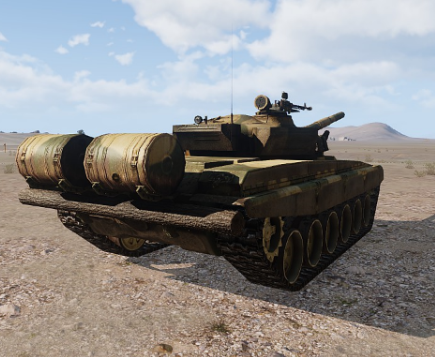
Rear Oblique
|
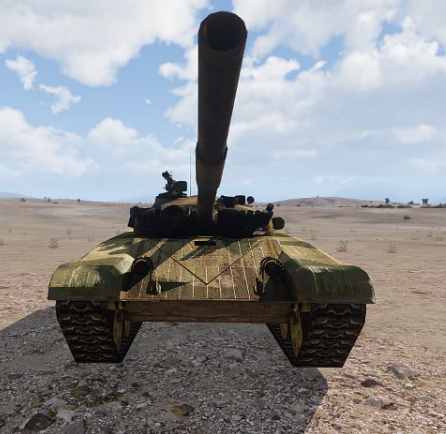
Front (Note: If unable to shoot from rear or side, it is best to directly engage the turret to attempt to disable it)
|
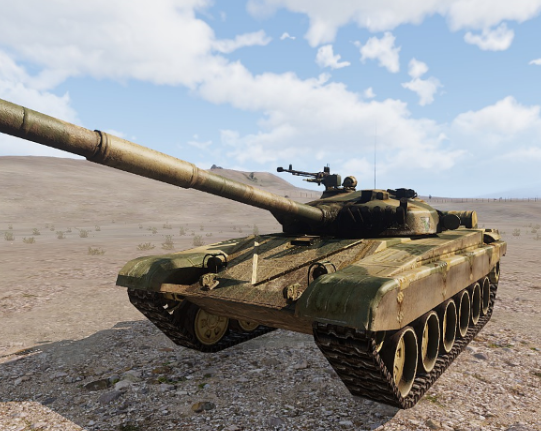
Front Oblique
|
Clearing Backblast
To prevent their anti-tank weapon from injuring or even killing friendly troops, an anti-tank rifleman must "clear backblast" before firing their weapon.
1. When preparing to make an anti-tank shot, the gunner quickly scans to their left and right while loudly declaring other players to "Clear backblast!". The gunner's scan is intended to give them visibility on who or what may be behind them, and help them visually verify that the backblast area is clear of friendly personnel.
2. Any team members nearby, upon hearing "Clear backblast!" spoken immediately shift position out of the danger area.
3. Anyone who has cleared the danger area, upon visually scanning it, is expected to declare "Backblast all clear!" to let the gunner know that they are able to safely fire.
4. Upon hearing "Backblast all clear!", or having visually confirmed that the area is clear, the anti-tank gunner confirms their sight picture before loudly declaring "Rocket!" and firing the weapon.
Firing from Enclosures
Firing anti-tank weapons indoors can be very hazardous to your health. Avoid doing so when possible, as the backblast can kill or seriously injure you due to the restrictions of the structure.
Soft-launch weapons like the Javelin can be safely fired out of an enclosed space, but RPGs, AT-4s, SMAWs, and other common hard-launch anti-tank weapons cannot.
Soft-launch weapons like the Javelin can be safely fired out of an enclosed space, but RPGs, AT-4s, SMAWs, and other common hard-launch anti-tank weapons cannot.
The squad
Squad Structure & Leadership
A rifle squad is formidable force on the battlefield. Consisting of three-four fireteams of four-six players, and a squad leader element of two-four players, this fourteen player unit is able to have a significant impact on the flow of a battle.
A rifle squad is formidable force on the battlefield. Consisting of three-four fireteams of four-six players, and a squad leader element of two-four players, this fourteen player unit is able to have a significant impact on the flow of a battle.
Squads consist of an impressive array of firepower, and are just as well-rounded as the fireteams they are composed of. In addition to their ability to inflict significant harm, they also are accompanied by a combat lifesaver who can tend to any wounds that may be received through the course of a fight. The combat lifesaver acts as the second man in the two-man squad lead element, providing security for the squad leader when they're not tasked out with tending to wounded squad members.
The order of leadership succession in a squad goes from the squad leader to the first then second team leaders.
The order of leadership succession in a squad goes from the squad leader to the first then second team leaders.
The following are squad-level specific roles:
Squad Leader ("SL")
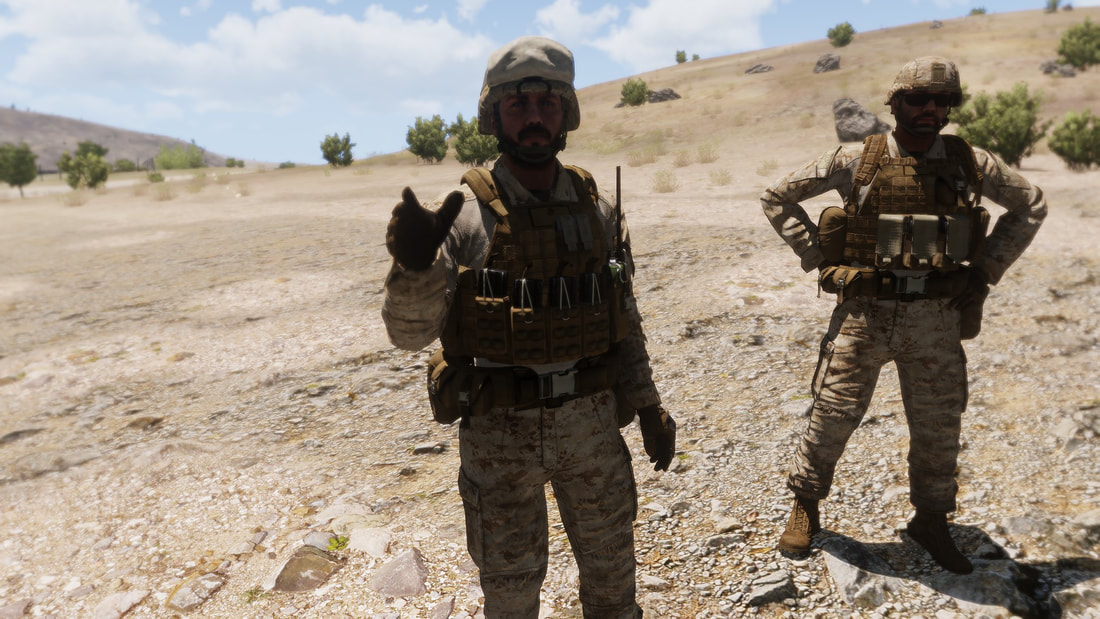
The squad leader has similar responsibilities to the fireteam leader, except instead of controlling individual players, they control entire fireteams. They are tasked with leading their squad in accordance with the platoon commander's intent and direction, as well as coordinating laterally with their fellow squads. The squad leader's motto is to "Lead from the front", since they know that they cannot direct their fireteams most efficiently if they cannot observe their movements and combat.
Squad Leaders...
• Get their direction from the platoon commander. They are expected to be able to take a broad goal set by the platoon commander, and turn it into a plan that they can pass down to their fireteam leaders. This includes setting rules of engagement, formations, waypoints, rally points, movement speeds, and any other relevant information.
• Ensure that their team leaders and squad members know what the plan is. The "commander's intent" is conveyed to all squad members so that whatever happens, regardless of casualties, everyone knows what the end goal is and can adapt and work towards that with flexibility and responsiveness.
• Position themselves so that they can best observe their fireteams, and exercise command and control over them. A squad leader who isn't staying close to their fireteams is quickly rendered ineffective. Squad leaders must always be with their fireteams, positioned where they can make sound and timely tactical judgments, and issue clear and appropriate orders. Typically a squad leader will be just behind the front line, positioned to where they can see as much of their squad as the tactical situation allows for.
• Dictate squad formations, rules of engagement, and general combat posture, adapting to the situation at hand and the Platoon Commander's guidance. The squad leader must be ever vigilant regarding the tactical situation and must be able to make timely adjustments to the squad's formation, ROE, posture, and more.
• Communicate key information across to other squad leaders and up to the platoon commander. This includes information like casualties incurred, enemy contacts, ammunition status, and other vital pieces of information that maintain the platoon's situational awareness and assist the other squad leaders and platoon commander in their planning.
• Maintain situational awareness on the platoon's disposition, as well as that of the enemy. Knowing where friendly forces are is critical to avoiding friendly fire incidents, and knowing where the enemy is gives the squad leader important information to use in making tactical decisions. The squad leader should be actively telling their squad members where friendly forces are, to ensure that the risk of blue-on-blue is minimized.
• Wield their fireteams as their weapons by directing and controlling their fire, picking out and assigning key targets, and maneuvering the fireteams across the battlefield. A squad leader who is giving good, timely orders, maneuvering his fireteams through combat and directing their fire, does far more damage to the enemy than one who is preoccupied with his own rifle. A squad leader avoids becoming personally engaged in firefights when possible, instead focusing on designating targets, maintaining awareness of the tactical situation, communicating with higher leadership, maneuvering the teams, directing and controlling their fires, and coordinating the handling of any casualties that occur. The squad leader may use their rifle's tracers to direct fire, or UGL smoke or flare rounds to designate targets or screen movement, but they generally spend more time commanding than they do shooting. This has the additional benefit of making them less likely to draw the attention of the enemy, and helps to prevent tunnel vision from taking effect.
• Know how to consolidate and reorganize teams when casualties occur. This includes using group management features in an expedient fashion, as well as consolidating communication channels when required.
• Keep their squad tied-in with other friendly squads when moving in a platoon formation. The squad leader must stay aware of how close their squad is to other squads, to ensure that dangerous gaps do not develop in the overall formation. The tighter and more broken the terrain, the more important this becomes.
Squad Medic
Note: You may see words such as "Medic", "Corpsman", and "Combat Lifesaver" thrown around by different organizations. Each are different terms to describe a medical technician. For those with realism in mind, Corpsman is exclusive to the Navy, Medic is exclusive to the Army & Air Force, and Combat Lifesaver is a universal term that can be applied for any branch. For the purposes of this guide, the term "Medic" will mostly be used as it is the most commonly known term.
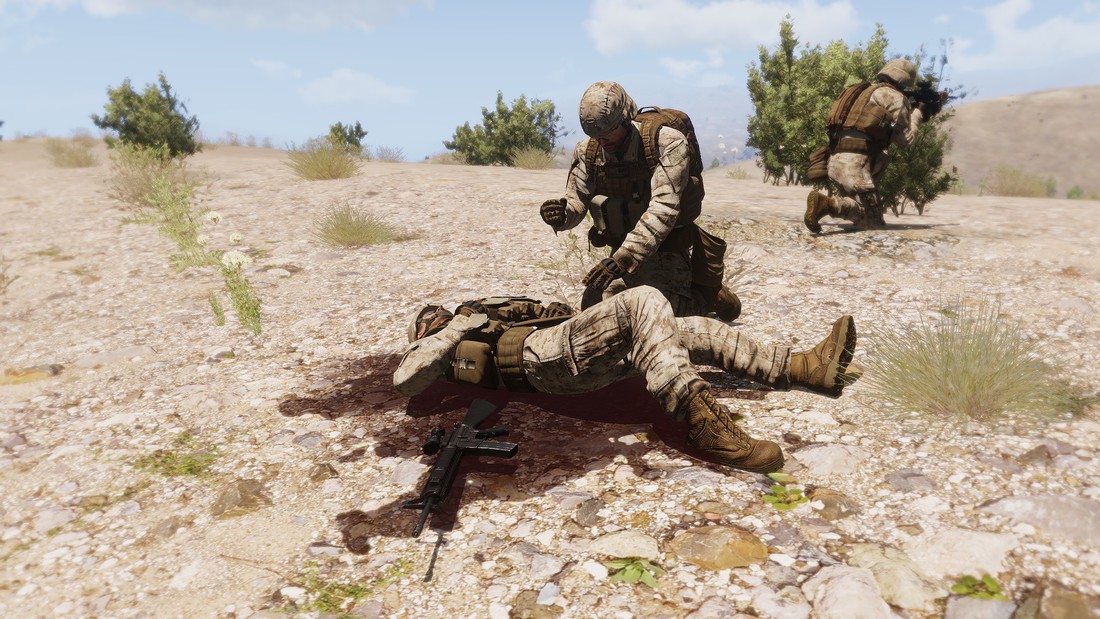
When so many rounds are flying around, someone's bound to get hit sooner or later. Unfortunately, this someone is occasionally a fellow squad member. When it happens, the squad medic is the man to turn to. The squad medic is critically important - they are the key to maintaining the combat effectiveness of the squad when heavy contact has been made.
Squad Medics...
• Are concerned first and foremost with the welfare of their squad members. While a Medic carries a rifle, it is nowhere near as powerful as the skill they bring as a healer. Medics leave the fighting to the infantry, instead focusing on patching up the wounded and getting them back into the fight. Medics should only fire their weapon in self-defense, or in the defense of the wounded.
• Stay slightly removed from the front line. This gives the Medics a view of the bulk of the squad disposition and helps to prevent tunnel vision. By staying off of the front line, the medic is able to maneuver to different fireteams more easily in response to people being wounded, without drawing the same kind of fire as a frontline player.
• Look out for their squad leader and provide rear and flank security when not acting in a medical capacity if there are no extra squad members. The squad leader often is preoccupied with commanding fireteams, leaving them less time to watch their own back and flanks. The Medic fills this gap whenever not actively helping out wounded players.
• Are comfortable with using smoke to provide concealment for the wounded. Medics carry a number of smoke grenades that are intended to be used to conceal wounded players so that someone else can rush out and drag them to safety. Knowing where and when to throw these smoke grenades is a key skill for a Medic to develop. A Medic must be conscious of masking the wounded person from enemy observation, while at the same time not compromising the visibility of friendly elements.
• Triage their patients. A Medic must be able to rapidly diagnosis casualties and pick out the ones that need the most urgent attention. Find those who are heavily damaged - such as those that can no longer move at a jogging pace - and prioritize their treatment. People who have been lightly wounded and are in pain can wait - the urgent ones cannot. In more advanced wounding models, various medical treatment options may be available, with more wounding states, such as unconsciousness, cardiac arrest, etc. The triaging of these sorts of near-death casualties always takes precedence over those who are lightly wounded.
The platoon
Platoon Organization & Purpose
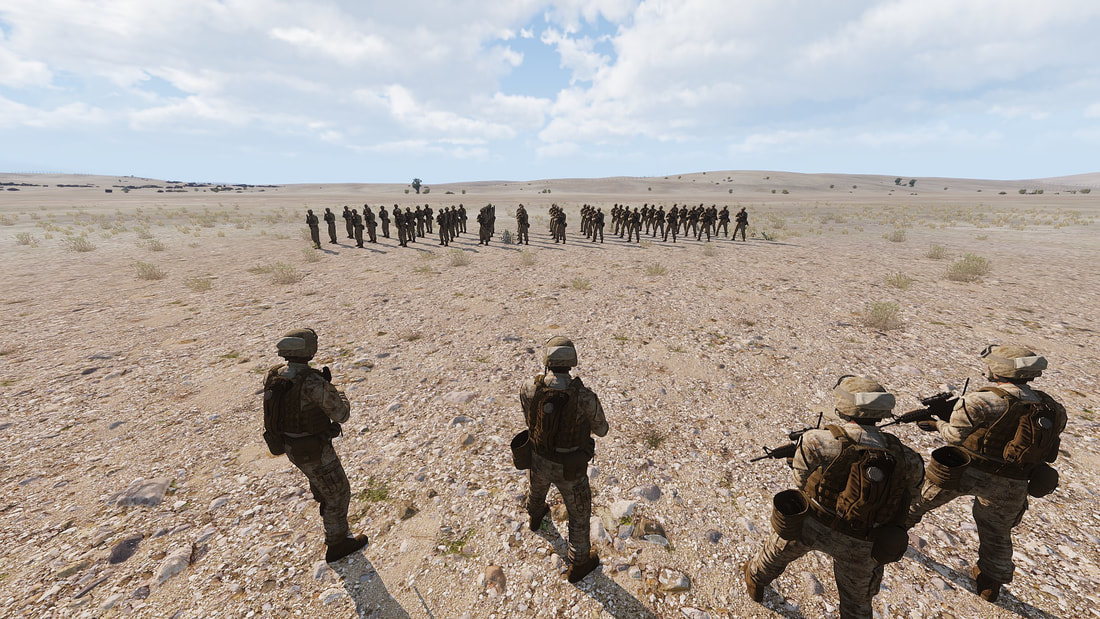
Composed of three or four squads - Alpha, Bravo, and Charlie, as well as a four-man Command Element, platoons are one of the largest exclusively player-controlled units that can be fielded in Arma 3.
Composed of three or four squads - Alpha, Bravo, and Charlie, as well as a four-man Command Element, platoons are one of the largest exclusively player-controlled units that can be fielded in Arma 3.
Platoon HQ Roles
The platoon headquarters element ("PltHQ") consists of:
• Platoon Commander ("PltCo").
Takes orders from the Company Commander and leads their platoon in accordance with said orders.
• Platoon Sergeant ("PltSgt").
The right-hand of the PltCo, fulfilling a wide variety of roles depending on the mission type given.
• Platoon Medic ("PltMed").
Acts as the senior combat lifesaver of the platoon. They deal with any casualties that the squad medic cannot handle, and stands ready to reinforce a rifle squad in the event that their lifesaver becomes a casualty.
• Grenadier
Tasked with providing security for the PltHQ element.
Platoon Commander ("PltCo")
A platoon commander's role can vary significantly depending on whether they're operating as the senior member of a mission, or as one of multiple platoon commanders under the direction of a company commander. In the event that they are the senior member, their role expands to encompass the considerations detailed in the "Company Commander" section - if not, his task is made somewhat easier by the company commander assuming the higher-level aspects of the mission. Regardless, the platoon commander has many responsibilities. They are the final say in all things related to their platoon and are responsible for the conduct of their assigned mission from start to finish. They direct the three main squads of the platoon, as well as any attachments, and use a multitude of skills to accomplish the platoon's mission with the minimal friendly and the maximum enemy casualties.
The platoon commander's motto is "Life or death, from my commands"'. This is intended to remind them of the fact that the virtual lives and, more importantly, the morale of every member of their platoon is ultimately their responsibility, and that their orders, good or bad, will at some point result in someone (and in bad cases, many!) having to sit out due to virtual death. It is important that the PltCo is able to function as a leader even when things aren't going according to plan and virtual bodies are stacking up. Their cool-headed orders, given in the midst of raging fights, are often the deciding factor between victory and defeat for their platoon, and by association, the company.
The platoon commander's motto is "Life or death, from my commands"'. This is intended to remind them of the fact that the virtual lives and, more importantly, the morale of every member of their platoon is ultimately their responsibility, and that their orders, good or bad, will at some point result in someone (and in bad cases, many!) having to sit out due to virtual death. It is important that the PltCo is able to function as a leader even when things aren't going according to plan and virtual bodies are stacking up. Their cool-headed orders, given in the midst of raging fights, are often the deciding factor between victory and defeat for their platoon, and by association, the company.
The Platoon Commander...
• Briefs the squad leaders and element leaders and ensures that the plan conveyed to them by the company commander is understood.
• Conveys the commander's intent to all of their squad and element leaders. They insure that their squad and element leaders know why they're doing what they're doing, how they're doing it, and what the desired end state is - both at the platoon and company level. Thus, if necessary, an element leader can make a rapid tactical decision, or assume command of the entire platoon if casualties are taken, all while still acting within the guidance of the intent of the PltCo.
• Distributes special assets assigned to their platoon by the company commander. This includes attaching machinegun or antitank teams to squads, assigning vehicles to support squads, and assigning transport vehicles or aircraft to specific squads when available.
• Supervises the execution of the platoon's mission, issuing new or updated orders as it progresses. The PltCo stays on top of the tactical situation, and issues appropriate, timely orders as the tactical situation evolves.
• Position themselves where they can exercise the best command and control of his squads. In order to guide the fight effectively, it is important that the PltCo is able to see it. To this end, they must constantly judge where they can best accomplish this, and ensure they're able to safely maintain such a position. In the event that the platoon splits into assault and support elements, the PltCo will either go with the assault or stay at the support position - whichever they choose, they ensure that their PltSgt goes with the other.
• Uses their PltSgt to share the workload. The PltSgt is there to assist the PltCo wherever possible, and should be used as needed.
• Avoids micromanagement, trusts in the judgment of their squad leaders, and allows them to develop the fight when possible. Squad leaders are smart and capable individuals, so the PltCo treats them as such. In turn, squad leaders shine in the fight, it's their job to carry out orders while keeping their men alive. Giving them an opportunity to be creative in how they carry out orders, and trusting their assessment of the situation when given, is an important aspect of being PltCo.
• Keeps their squads within mutual supporting distance of each other whenever possible. A PltCo must be capable of making plans in which the platoon does not run off disorganized or attempting to do too much at once. This dilutes the combat power of the platoon and sacrifices the squads' ability to mutually support each other. The PltCo must be able to make judgment calls as to when the platoon should stay tightly focused and mutually-supporting, and when it is necessary to detach a squad (or more) to facilitate mission accomplishment. When in doubt, they consult with the company commander for guidance.
• Reorganizes the platoon as needed to fulfill the mission. This can include merging understrength elements into larger elements, or reorganizing the platoon in the event of significant casualties.
• Maintains awareness on the platoon's combat status, casualties, ammo, and other capabilities. This includes getting ACE (ammo, casualties, equipment) reports after fights. If resupply is needed in the future, he communicates this up to the company commander.
Platoon Sergeant ("PltSgt")
The Platoon Sergeant is an interesting leadership role that can be used for a variety of purposes. Primarily, they are as follows.
• To increase the platoon's efficiency in any mission by spreading the workload between the PltCo and PltSgt
• To observe a PltCo and help them develop.
• Provides law enforcement, training, liaison and logistics duties if dedicated roles are unavailable.
• To increase the platoon's efficiency in any mission by spreading the workload between the PltCo and PltSgt
• To observe a PltCo and help them develop.
• Provides law enforcement, training, liaison and logistics duties if dedicated roles are unavailable.
The Platoon Sergeant...
• Actively searches for ways that they can assist the PltCo in carrying out the assigned mission and is prepared to carry out any tasks that the PltCo assigns to them.
• Position themselves so that their view of the battlefield complements that of the Platoon Commander. When squads are split up, such as when employing support-by-fire and assault elements, the PltSgt will go with the element that the PltCo is not with. This allows them to report directly to the PltCo via radio and give timely orders to the element they are with, based on their direct observation of the tactical situation they are in.
• Exercises or assists in the command and control of the following elements when required. These are of particular importance when the platoon commander is busy directing squads in a fight - the PltSgt's involvement keeps him from being distracted and allows for greater efficiency. While the company headquarters will generally be in control of higher-level mission assets, platoon sergeants have the best eyes in their area of operations and can assist supporting units when operating in their area.
• Vehicle or weapons elements. When vehicle or weapons elements are attached directly to support a platoon, the PltSgt can give them guidance and request support directly through their radio channels.
• Close air support. The PltSgt communicates with the company forward air controller ("FAC") to request air support, marking his targets and ensuring they're understood. In the event that tighter coordination is required, the Company FAC may either move to the platoon's location or may temporarily transfer
terminal control over to the PltSgt - at which point the PltSgt is talking directly to the supporting aircraft.
• Artillery support. The PltSgt communicates with the company forward observer ("FO") to direct artillery fires, with the same basic guidance as when requesting close air support, above.
• Ammo resupply. If a logistics element exists, the PltSgt will communicate supply needs up to them. The logistics element will coordinate with the CoyHQ in order to determine when and where any resupply efforts will occur.
• Helicopter insertions or extractions. The PltSgt designates landing zones in their area of operations, gives the transport aircraft final guidance into the landing zones as required, and can help oversee the loading of squads into different lifts.
• Is prepared to step up and take command of the platoon if required.
Platoon Medic ("PltMed")
The Platoon Medic...
• Sets up the Platoon Aid Station ("PAS") when in the defense. The Platoon Aid Station should be situated in the middle of the platoon's defense, close to equidistant from each squad. The PAS will serve two primary purposes: One, it will allow for the Platoon HQ element to receive medical care furthest away from the fighting. Two, it will allow for all platoon members an alternate place to get medical attention if their Squad Aid Station is compromised or otherwise unusable.
• Reinforces squads who lose their medics when in the attack, and sometimes in the defense. This is a call that must be made by the Platoon Commander. In some situations they will detach the PltMed to a different squad, whereas in other situations it may prove safer to keep the PltMed further to the rear and simply bring all casualties from that squad to them or to another squad's medic.
• Acts as security for the PltHQ element. This simply means that when they're not doing something medical, they watch the back of the PltCo.

THE COMPANY
Company Organization & Purpose
A company typically consists of four platoons plus various attachments such as mortar or armored attachment. It may operate as a mechanized, motorized, airmobile, or armored unit - each having their own specific organizational structures and associated considerations. For the sake of simplicity, we'll talk about a traditional infantry company with attachments.
The company's platoons are labeled numerically - first, second, third and fourth (weapons) platoon - and each clocks in at about 40-50 players.
The company's platoons are labeled numerically - first, second, third and fourth (weapons) platoon - and each clocks in at about 40-50 players.
Company HQ Roles
The company headquarters element ("CoyHQ") consists of:
• Company Commander ("CoyCo").
The final say in all things planning and decision-making. Leads the entire Company in carrying out the assigned mission
• Company Executive Officer ("CoyXO").
The right-hand of the company commander, fulfilling a wide variety of roles depending on the mission type given. They typically carry out coordination with any attached units, logistics, or other assets - keeping the CoyCo free to look at the bigger picture.
• Company Medic ("CoyMed").
Acts as the senior lifesaver of the company. They typically deal with any casualties in the units or attachments operating closest to the CoyHQ, particularly those that may not have their own lifesavers, such as aircrews.
• Forward Air Controller or Forward Observer.
When either air or artillery are utilized, the fourth member of the company headquarters is responsible for helping to coordinate their employment. When not used in this role, the fourth member is simply a rifleman.
Additional CoyHQ elements may exist on a special basis, such as a logistics or engineer unit, though these will typically operate as an independent element that is attached to the CoyHQ for the purpose of the mission.
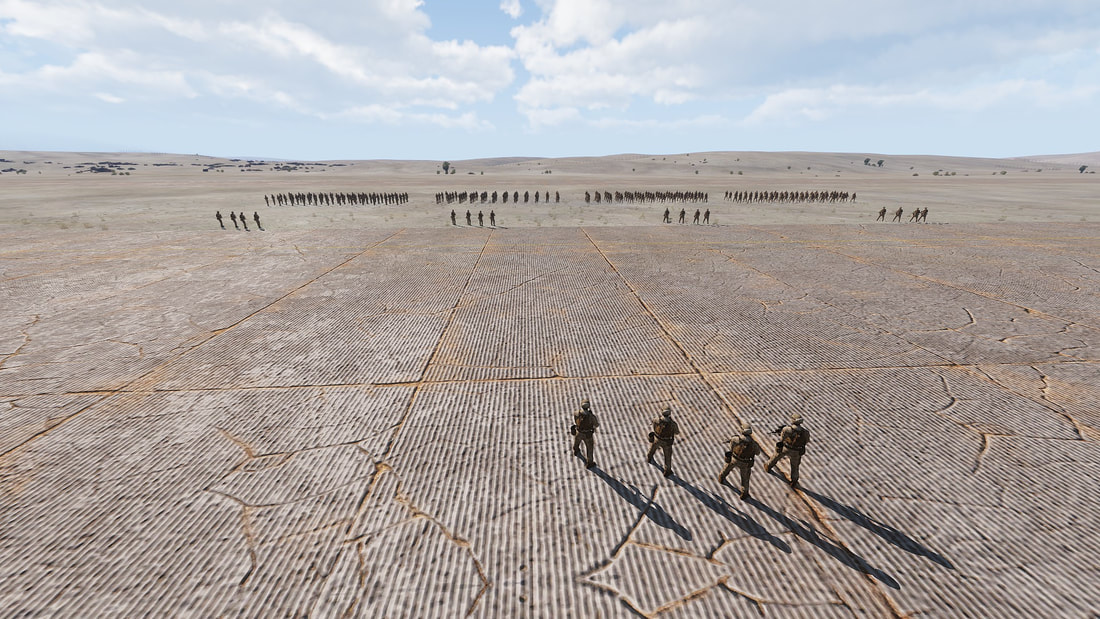
Company Commander ("CoyCo")
The company commander's role is similar to that of the platoon commander, except that instead of dealing with squads, they're dealing with platoons. This significantly changes the pace of their leadership – a CoyCo is able to look further ahead in the mission, spend more time on the details, and isn't as front-line as the platoon commanders. The company headquarters element is focused around spreading the workload – if logistics units are available, a representative will be traveling with the company headquarters. If air support is available, a member of the company HQ will act as a forward air controller – or a forward observer if artillery is present. The company executive officer is akin to the platoon sergeant – they may position themselves with one of the platoons while the company commander travels with or near another, or they may spend most of their time coordinating supporting assets.
The company commander is responsible not only for planning the entire operation, but also must work to adapt the plan to situations as they develop as well as efficiently utilize supporting assets to carry out said plan. They look ahead and determines when resupply, reinforcements, and other considerations will factor into things, as well as when and how to conduct larger-scale movements or shifts in objectives.
When operating at platoon strength or lower, the platoon commander takes on the responsibilities detailed for the company commander, while the platoon sergeant takes on the roles of the company executive officer.
The company commander's motto is 'Where next from here?' - this helps to remind them that they're the most forward-planning element and must continually be evaluating the situation and thinking several steps ahead.
The Company Commander...
• Plans the mission, briefs the platoon leaders and any special element leaders and ensures that the plan is understood.
• Conveys the commander's intent to all of their platoon and element leaders. Their intent allows for platoon and element leaders to know why they're doing what they're doing, how they're doing it, and what the desired end state is. Thus, if necessary, an element leader can make a rapid tactical decision, or assume command of the entire Company if the CoyHQ become casualties, while acting within the guidance of the intent of the CoyCo.
• Distributes special assets. This includes attaching machinegun or antitank teams to platoons, assigning vehicles to platoons, and assigning transport vehicles or aircraft to specific platoons when available.
• Dictates the Rules Of Engagement (ROE). Any special considerations are made and conveyed, and the platoons receive updated ROE from the CoyCo when appropriate.
• Determines how the company communication plan will work. This is based largely on unit standard operating procedures and will vary based on whether a unit is using Discord, Teamspeak, in-game VON, or a radio simulation mod like ACRE. It is the CoyCo's responsibility to establish and communicate the plan to subordinate units. In our group, a CoyCo marks out the radio channels for their side in an empty area of the map that all units can easily reference.
• Supervises the execution of the mission, issuing new or updated orders as it progresses. The CoyCo stays on top of the tactical situation and issues appropriate, timely orders as the tactical situation evolves.
• Position themselves where they can exercise the best command and control of their platoons. In order to guide the fight effectively, it is important that the CoyCO is able to see it. To this end, they must constantly judge where they can best accomplish this, and ensure they're able to safely maintain such a position. In the event that the platoon splits into assault and support elements, the CoyCO will either go with the assault or stay at the support position - whichever he chooses, he ensures that his CoyXO goes with the other element.
• Uses their CoyXO to share the workload. The CoyXO is there to assist the CoyCO wherever possible, and should be used as needed.
• Avoids micromanagement, trusts in the judgment of their platoon leaders, and allows them to develop the fight when possible. Platoon commanders have a great deal on their plate - the CoyCO lets them conduct the fight in their area, trusting their judgment to make the best of the situation. While a fight is ongoing, the Company Commander continually asses what they can do to help the platoon commanders - are there assets they can bring to bear in support, and if so, how would they best be employed?
• Reorganizes the company as needed to fulfill the mission. This can include merging understrength elements into larger elements, or reorganizing the company in the event of significant casualties.
• Coordinates with support elements such as arty and CAS, via their Forward Observers and Forward Air Controllers, if available.
• Maintains awareness on the company's combat status, casualties, ammo, and other capabilities. This includes getting ACE (ammo, casualties, equipment) reports from the platoon leaders after fights.
• Ensures that resupply is conducted as needed. Resupply can take several forms. They all basically involve a vehicle being loaded with ammo and gear and moved to the platoon's location. If resupply is impossible, the CoyCo makes the decision as to whether friendly forces should acquire enemy weapons (such as when ammo is critically low) or coordinates with all units to redistribute remaining ammunition throughout the platoon. Resupply is detailed further below.
Company Executive Officer ("CoyXO")
The executive officer is similar to the platoon sergeant - in short, they're a role that is designed to help spread the workload of the Company Commander. More specifically, they are often tasked with coordinating the employment of higher-level assets such as air support or transportation, artillery, and supporting elements like armor or mechanized forces.
The Company Executive Officer...
• Actively searches for ways that they can assist the CoyCo in carrying out the assigned mission and is prepared to carry out any tasks that the CoyCo assigns to him.
• Position themselves so that his view of the battlefield complements that of the company commander. When the mission requires platoons to operate in distinctly different areas, the CoyXO will tend to travel with the platoon that the CoyCO is not with. This allows them to report directly to the CoyCo via radio and give timely orders to the element they are with, based on their direct observation of the tactical situation they are in.
• Exercises command and control over the following elements when required. These are of particular importance when the company commander is busy directing other actions - the CoyXO's involvement keeps him from being distracted and allows for greater efficiency.
• Vehicle or weapons elements. The CoyXO stays in close contact with the overall commanders of different elements, helping to direct them around the battlefield in accordance with the CoyCO's plan.
• Close air support. By coordinating with the company's forward air controller and any elements requesting air support, the CoyXO can ensure that timely air support is delivered for the elements that most need it.
• Artillery support. By coordinating up with the company's forward observer as well as talking with the units requesting support, the CoyXO ensures that artillery is prioritized to the units that need it most.
• Ammo resupply. The CoyXO is able to direct the logistics train to establish resupply points in accordance with needs and operational tempo. They notify the CoyCO when such supply points have been established, allowing the CoyCo to direct a mission-wide resupply effort to commence.
• Helicopter insertions or extractions. The CoyXO helps to identify landing zones, split platoons into helo lifts, and otherwise coordinate large-scale helicopter troop movements.
• Is prepared to step up and take command of the company or a platoon if required.
Company Medic ("CoyMed")
The company medic is the lifesaver who is grouped with the company headquarters at the start of a mission. The company medic has several responsibilities above and beyond what squad or platoon medic have, and is considered to be the senior lifesaver in any given mission.
The Company Medic...
• Provides medical aid to units not covered by existing medical assets. This typically comes in the form of aircrews or armored/mechanized crews. The location of the CoyHQ behind the lines of the main combat tend to make it a good location for such crews to drive or land to seek medical aid.
• Helps to coordinate medical resupply. The CoyMed keeps in contact with the platoon combat medic in order to assess when medical resupply may need to be called in.
• Drives or directs any medical vehicles attached to the company. In the event that multiple medical vehicles are employed, the CoyMed will be in charge of the element tasked with crewing them. In the absence of medical vehicles, the CoyMed may act as the driver for the CoyCo.
Forward Air Controller ("FAC")
The Forward Air Controller ("FAC") is a player who is tasked with coordinating air elements in the support of ground forces and frequently is assigned to the company headquarters element. The FAC is expected to be knowledgeable in the employment of any CAS elements, be they fixed-wing (jets) or rotary-wing (helicopters). The more familiar the FAC is with the aircraft, the better they will be able to direct its employment. The best FACs have extensive experience as a CAS aircraft pilot.
The primary job of the FAC is to locate enemy targets and call in air strikes on them. They act as the "eyes on the ground" for the CAS aircraft and increases the effectiveness of the air support with the information they are able to relay to the aircraft, acting as the liaison between the CoyHQ and any supporting aircraft.
It is of great importance that a FAC is used when player-controlled aircraft are operating in a close air support role. Without their support, the CAS aircraft cannot reach the same level of responsiveness and effectiveness.
The forward air controller role is described in greater detail in the Combined Arms: Close Air Support section, later.
Forward Observer ("FO")
The Forward Observer or "FO" is a player who is tasked with coordinating artillery support for the platoon. They are expected to be knowledgeable in all things artillery, from the types of rounds to use, how to call for fire, how to adjust fire, and everything in between.
The forward observer role is described in greater detail in the Combined Arms: Artillery Support section, later.
The forward observer role is described in greater detail in the Combined Arms: Artillery Support section, later.

RESUPPLY
Conducting Resupply Operations
Extended battles tend to result in quite a lot of ammo expenditure as well as the potential for casualties. In order to give a unit the endurance to complete a lengthy action, tactical pauses may need to be conducted in order to carry out a resupply and reinforcement operation. Resupplying is either planned in advance to occur at a given point during a mission, or if unplanned, happens because of the collective reports of all subordinate units. A platoon or company commander stays on top of the ammunition status for his overall unit – once it gets low enough, but before it reaches a critical level, he will make a plan for conducting resupply.
Resupply can be carried out in several different ways, depending on the force composition and supporting assets available. The most typical form is that of a logistics train – a collection of vehicles that bring with them ammunition, as well as repairs and additional fuel for any vehicle assets. Logistics are often under the control of an engineer section, operating closely with the platoon or company headquarters to determine when and where they'll set up their resupply points.
Resupply begins with the appropriate units adopting a defensive posture – often in the form of a "go firm" command. Headquarters will determine a resupply site, picking something that is sheltered and defensible, then establish friendly elements in a defensive posture around it. After that, the resupply vehicles will arrive and position themselves centrally. Each squad will resupply in sequence, sending half of their strength at a time to gather ammo, anti-tank weapons, and other supplies from the resupply point. Any vehicles will refuel and rearm in sequence. The goal is to ensure that regardless of who is resupplying at any given time, the bulk of friendly forces are spread out and ready to repel any surprise enemy attacks.
If reinforcements are being delivered, these reinforcements will arrive in the same manner as the resupply vehicles. If arriving as a cohesive squad element, they'll report to the higher headquarters and be given instructions as to where they should position themselves in the overall formation. When arriving piecemeal, reinforcements will report to the PltSgt or company executive officer for assignment to replacement squads.
If reinforcements are being delivered, these reinforcements will arrive in the same manner as the resupply vehicles. If arriving as a cohesive squad element, they'll report to the higher headquarters and be given instructions as to where they should position themselves in the overall formation. When arriving piecemeal, reinforcements will report to the PltSgt or company executive officer for assignment to replacement squads.
Resupply via Unmanned Ground Vehicle
The Unmanned Ground Vehicles allow infantry units to have resupply brought to them directly, even in rough terrain. These UGVs - directed either by a member of the company headquarters or an attached UGV section - are capable of resupplying a platoon with ammo, medical aid, grenades, and also anti-tank weaponry. Logistics units can even deploy themselves to a fixed site behind the action, then send out UGVs to ferry necessary supplies up to the front line. This can be very helpful when the tactical or terrain situation prohibits the larger logistics vehicles from getting too close to front-line forces. The same may be applied to Unmanned Aerial Vehicles.
Resupply Drops
Note that ground is not the only angle for resupply or reinforcement. In terrain that does not permit easy ground resupply, or when operating over large distances, aerial resupply may be the preferred method. This is similar to ground resupply – the main difference is that ground forces must secure an appropriate landing zone for helicopters to bring troops and gear in via. Aerial resupply can also be conducted via supply drops – either through cargo planes dropping palletized supply crates under parachute, or via helicopters doing the same. The trick with this sort of aerial resupply is for the aircraft to have judged the wind and drop zone correctly – watching a pallet of much-needed ammo drift in the wind and end up landing on another ridgeline across a deep valley is less than desirable.
Aircraft Rearm & Refuel
For aircraft needing additional ammunition or fuel, two options tend to be available. The first is to return to the airbase they initially launched from – often a bit of a trek, but an aircraft can typically find full faculties for rearm, repair, and refuel at major airbases. At other times the ground forces may have established Forward Area Refueling/Rearming Points, known as FARPs. These are intended to be used by helicopters and are generally placed close to the front lines. A resupply train operating in trail of a friendly unit can act as a FARP in a pinch as well. Whatever method is used, aircrew ensure that the ground forces understand how much loiter time they have, giving advance warning before going off-station to rearm or refuel. In particularly heavy fighting, ground units will tend to go firm while their air cover is absent. When multiple air units are available, efforts will be made to ensure that one unit is on-station while the other rearms – never leaving the ground forces without some sort of aerial support.
Individual Initiative
Now that we've covered the roles and responsibilities of everyone in a basic Platoon, let's take a moment to talk about individual initiative and how critical it is to foster within players. It is extremely important that all players of the platoon understand that they need to have individual initiative in the game. Micromanagement is to be avoided whenever possible, and this means that there is a good possibility that you'll have to take initiative at your level to do something that may not have been specifically spelled out to you but is clearly in the "commander's intent", whether that commander is a FTL, SL, PltCo, or CoyCo.
Here are a few examples of individual initiative at various levels.
Here are a few examples of individual initiative at various levels.
Fireteam Member Individual Initiative
"While in infiltrating through enemy territory you suddenly see an enemy infantryman taking aim at another fireteam nearby. You immediately take aim and fire upon the enemy while simultaneously giving a hasty contact report to those around you. Your action neutralizes the enemy and quite possibly saves the life of one or more players in the other fireteam that was about to be hit."
In this example, it is clear that the stealth consideration is secondary to preserving the lives of friendly players. Since the enemy appeared ready to shoot, it was imperative that you took him under fire as soon as possible, without worrying about getting authorization. This is the core of what the Universal Rules of Engagement guidelines are intended to help address.
Fireteam Leader Individual Initiative
"As a Fireteam Leader, the Squad Leader tells you to hold up while he waits for another squad to catch up to the platoon. You see that the location that you're presently at is about 20 meters short of having a good perspective on the terrain in front of you, due to a brush line that is obstructing your view. You take initiative and move your fireteam 20 meters forward so that they can observe the terrain past the brush line."
In this example, the commander's intent is clearly to stop and take good defensive positions while waiting for friendly units to get in position. Although he did not specifically tell you where to position your fireteam, it is logical that you should be in the best possible position to cover your assigned sector. Since you only need to move 20 meters to accomplish this, it's an easy decision to make.
Squad Leader Individual Initiative
"During heavy fighting, communication is lost with the Platoon HQ section. It is unclear whether they were ambushed. Without hesitation, you announce over the radio that you are taking control of the platoon temporarily. Once assuming command, you order the squads to continue fighting in accordance with what the PltCo's plan was, and change things/react to events as necessary. Once the fighting is over, you try to find out what happened to the PLTHQ section. "
In this example, you realize that it is imperative that a clear commander is established as soon as possible due to the heavy fighting. Whether or not the PltCo had his mic crap out, lost his voice connection temporarily, or anything else is secondary to this - the important part is to gain control of the platoon and command it until the fate of the PltCo can be determined.
Other examples of Individual Initiative
• A combat lifesaver setting up an aid station during a defense mission without having to ask whether they should, or where they should place it.
• An artillery observer plotting fire on various likely targets and having the artillery stand by to fire at his command if necessary.
• A mortar crew setting up their position and plotting targets without having to be specifically instructed by the PltCo.
• Calling out "Check fire!" or "Cease fire, you're shooting at friendlies!" when you have reason to believe that you are being fired on by friendly forces or that friendly forces are firing on friendlies. To be clear, this is as opposed to just saying "hay guys I think we're being shot at by friendlies". "Check fire!" or "Cease fire, you're shooting at friendlies!" is much more decisive and ceases shooting much faster than anything else.
